Skip to Content

Category Archives: Recipes

Vegan Cuban Black Beans! (Instant Pot)

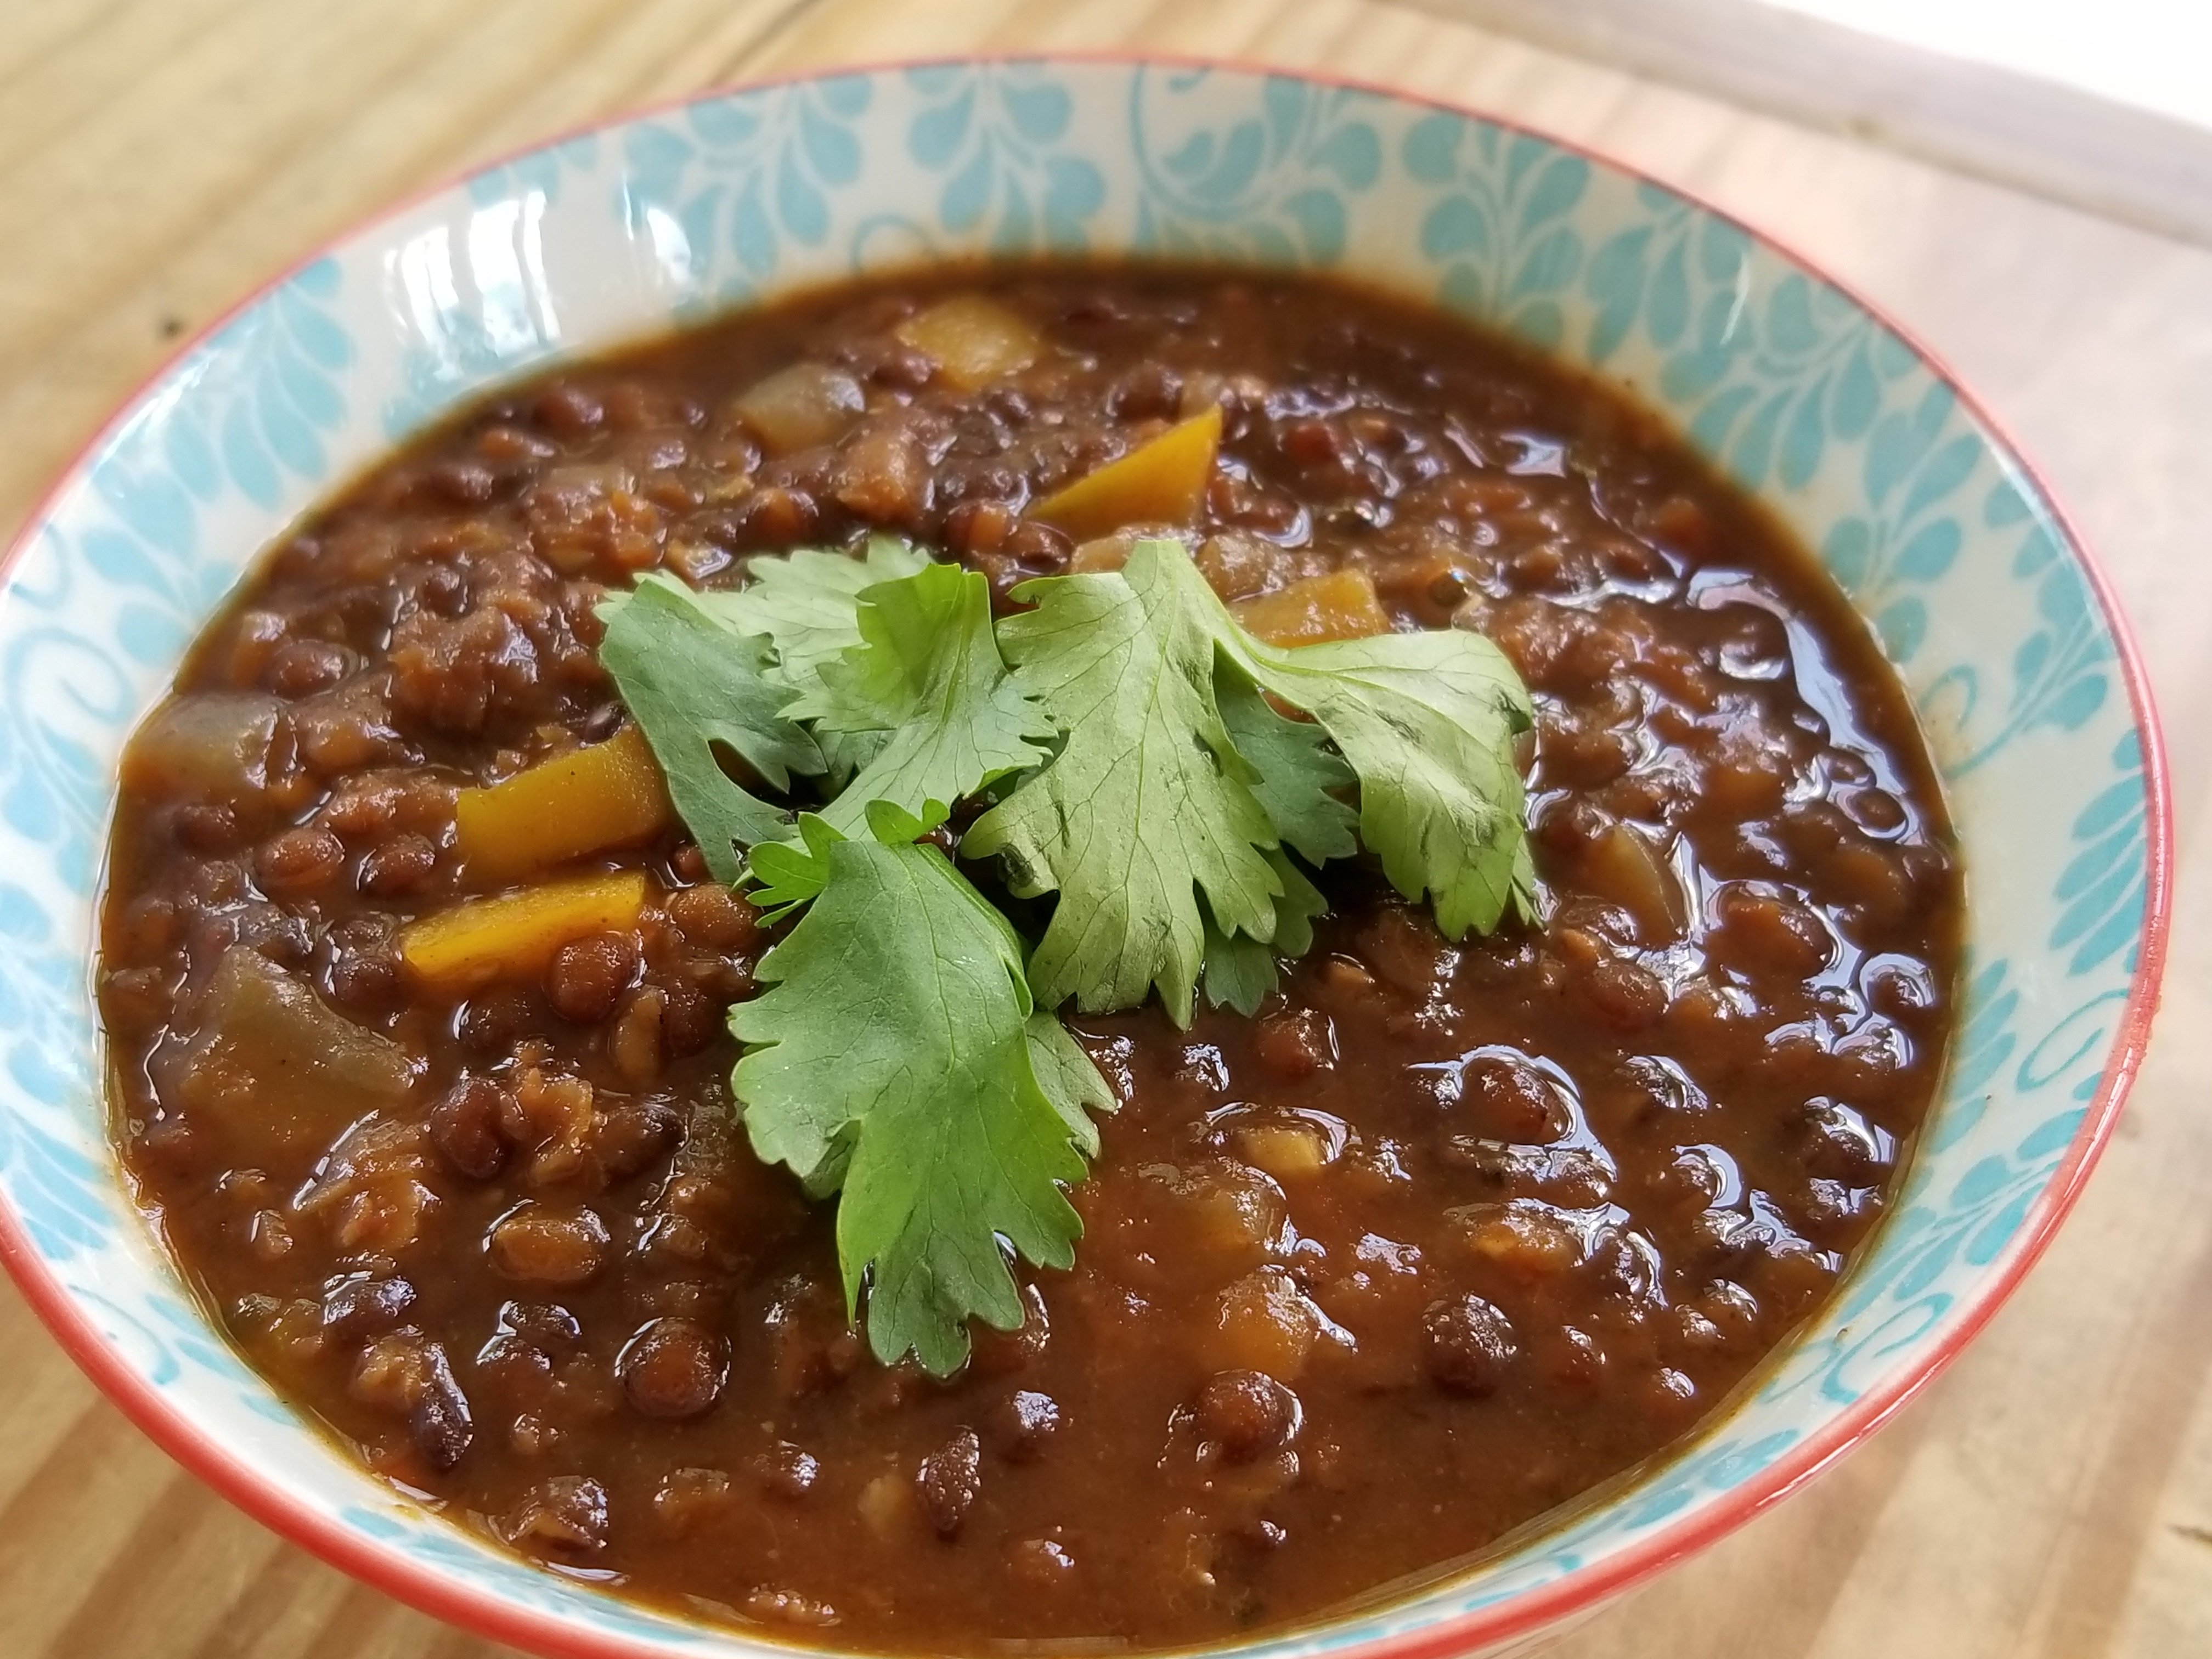
Have you ever tried a recipe that after the very first time you make it become part of your meal plan arsenal? This is one of them, so get ready! When we went plant-based as a family more than a year ago, this became the filling for tacos and burritos on Taco Tuesday dinner (the kids decided Tuesday was for tacos – I don’t know who told them!). I had been buying premade black beans and seasoning them when we didn’t have time for cooking a batch from dried beans, but with six of us to feed and all the extra salt that’s in canned beans, I decided to find a recipe that tasted better and was healthier and cheaper.


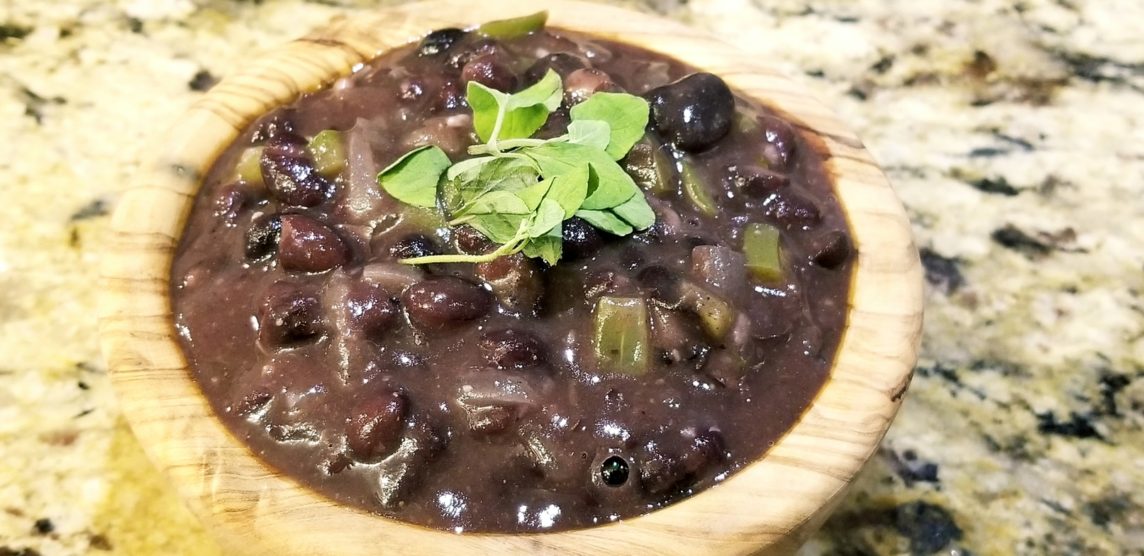
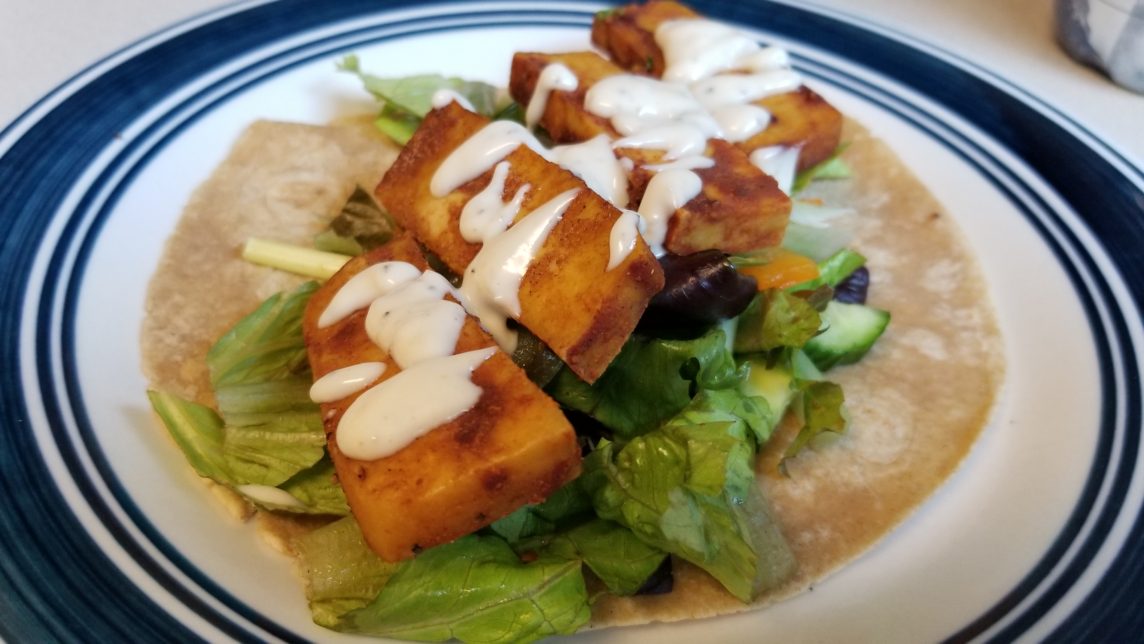
I love beans. When we stopped eating animal foods, the first question we got from friends and family was often “Where do you get your protein? Well, beans and lentils are great sources of protein as well as fiber, which most Americans don’t get nearly enough. One cup of black beans has 15 grams of protein and 15 grams of fiber as well as folate and other nutrients. They really are a nutritional powerhouse! And they are delicious, so what’s not to love? This recipe has onions and garlic and green pepper and cumin and oregano – the kitchen smells amazing! We make these black beans and stuff them in tacos and burritos with black rice (my favorite kind!) and guac and salsa and chipotle hot sauce (and a little vegan cheese shreds for the kids). But the best thing of all is that you can get all this deliciousness fast, and for me, that’s what makes this a keeper for our family. Delicious is required, but if it’s too complicated that recipe just won’t get made too often. If you remember to soak the beans the night before, you can have this ready to eat in one hour with about 15 minutes of it hands-on time. If you actually make this in the Instant Pot, you could make this the morning of and leave it on warm until you get home. Or, make it in advance and warm it from the refrigerator. You can even freeze what you don’t eat for a later meal. Trust me, you will want to make this one again!
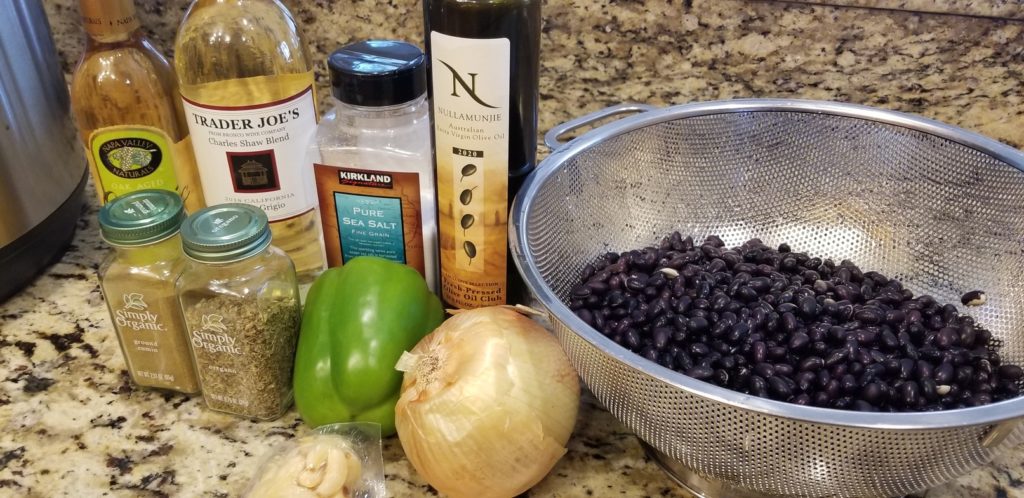
 

Ingredients

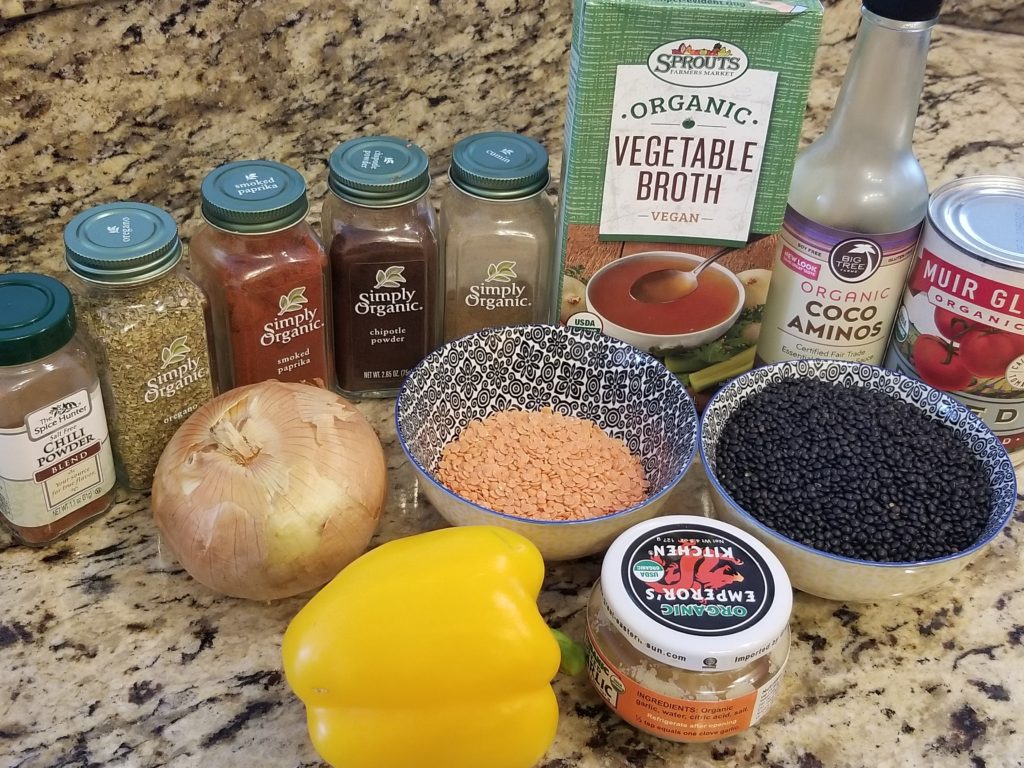
1 pound black beans, soaked overnight or 8 hours

4 cups water

1/2 cup olive oil

one onion, chopped

one green pepper, chopped

4 garlic cloves, minced (I use more because garlic and beans are lovely together, but the recipe only calls for 4)

1/4-1/2 tsp cumin (I use a generous 1/2 – I love cumin!)

1/2 tsp oregano

3-4 teaspoons salt (sounds like a lot, but it flavors the whole pound of beans)

1/2 tsp ground black pepper

2 tbsp white vinegar

2 tbsp white wine (optional, but good)


First, soak the beans. Soaking removes phytic acid which may impair the absorption of some nutrients. Also, it may help the beans to cook more evenly. Some believe soaking makes the beans more digestible – but it may be that people who eat beans adapt and digest beans more easily anyway. There are arguments about all of this, so do what you want – you’ll just need to cook your beans a little longer. I soak the beans.


Gather the ingredients.


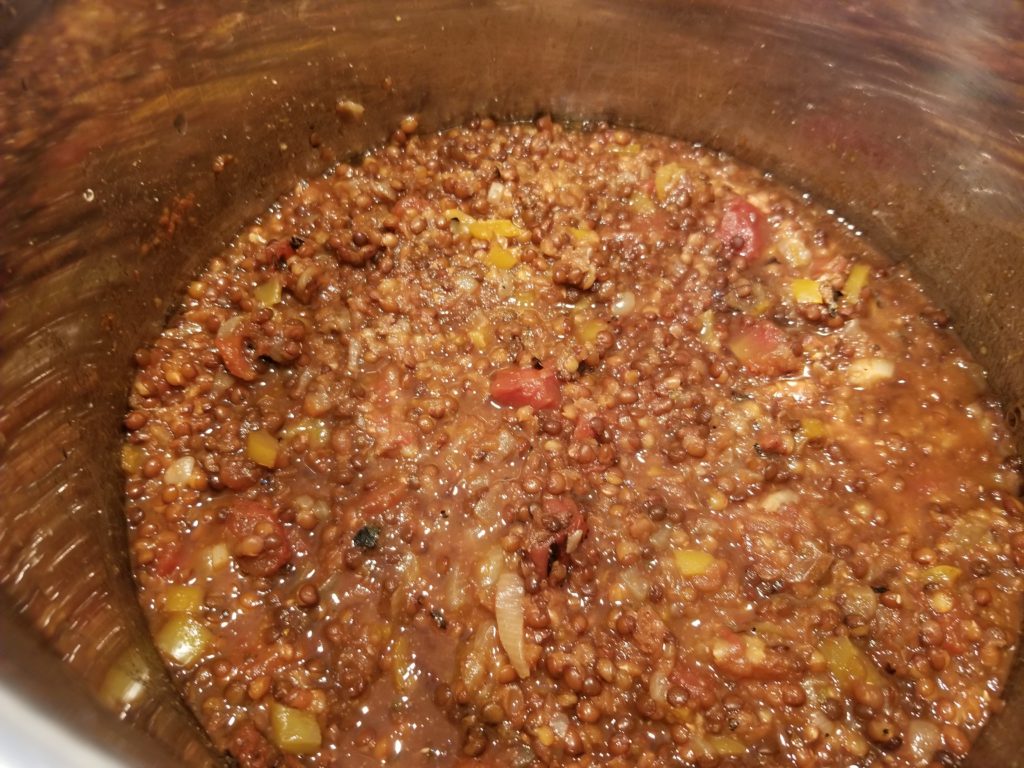
Put the water and beans in the pot. Cook your rinsed beans on high pressure for 35 minutes.


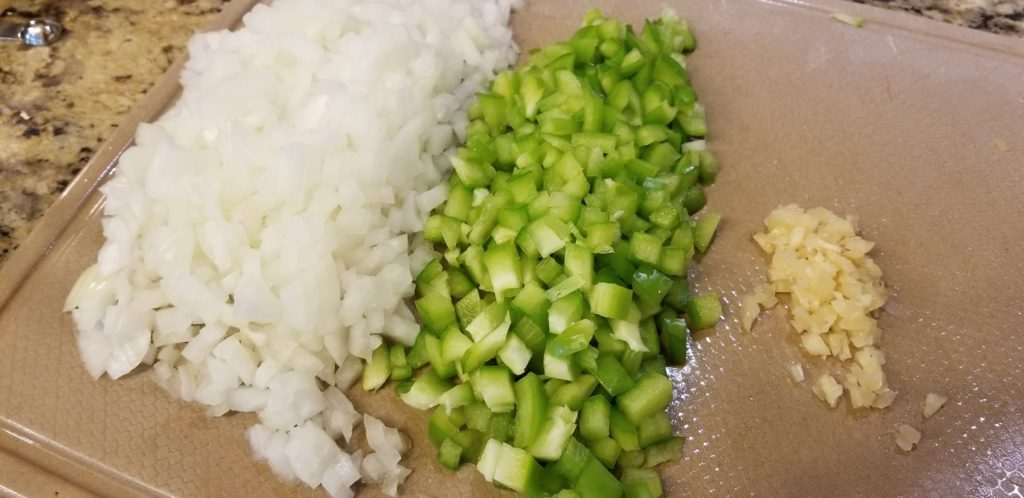
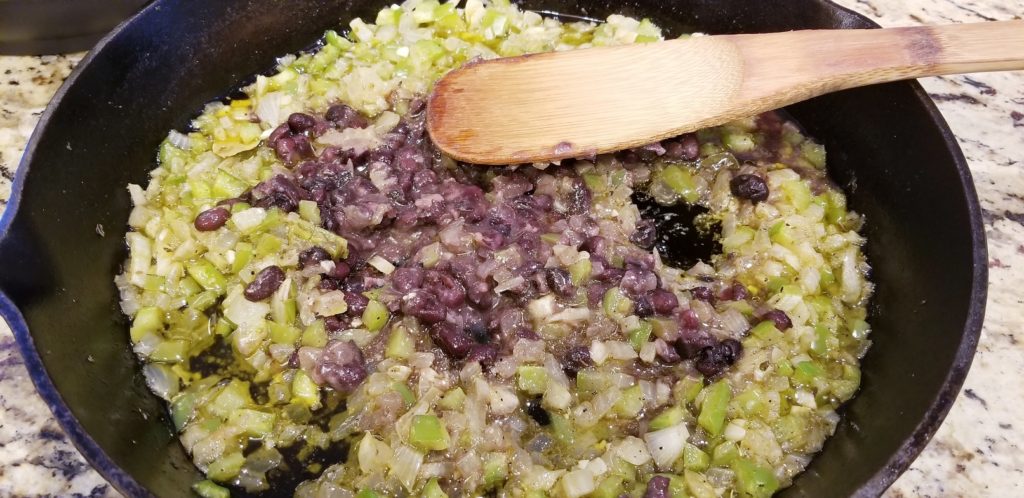
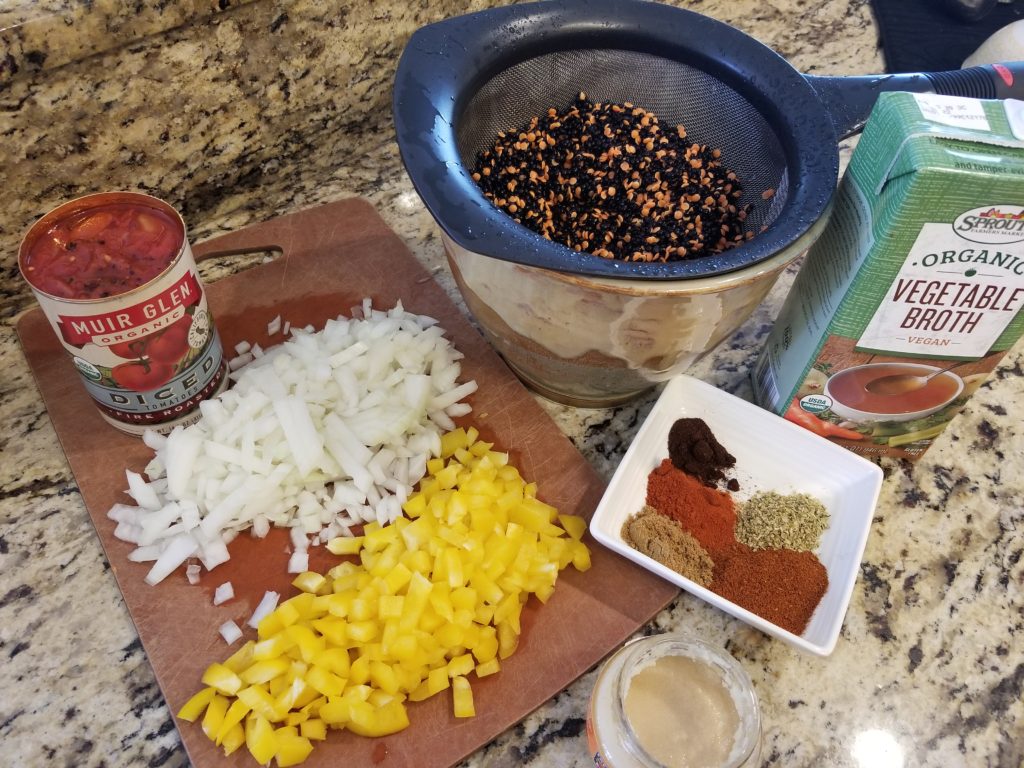
While the beans are cooking, chop your pepper, onion, and garlic.


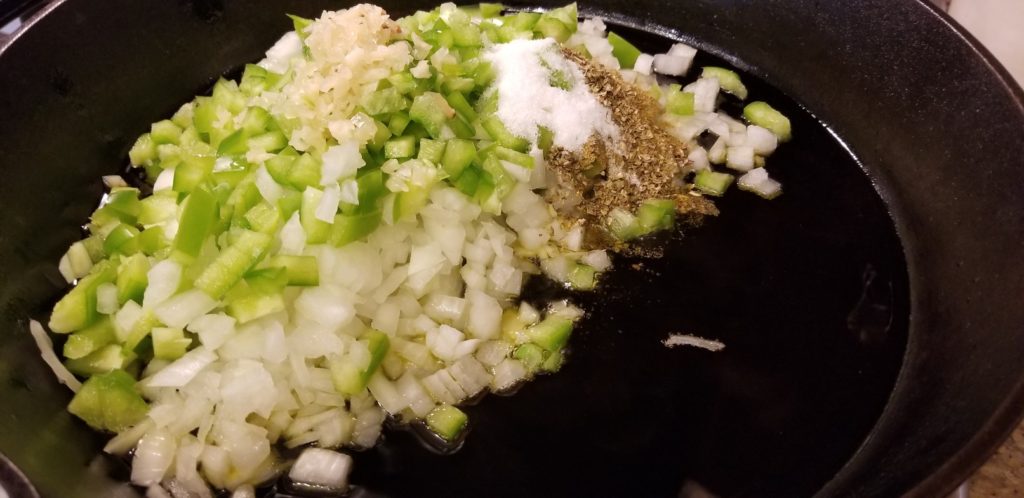
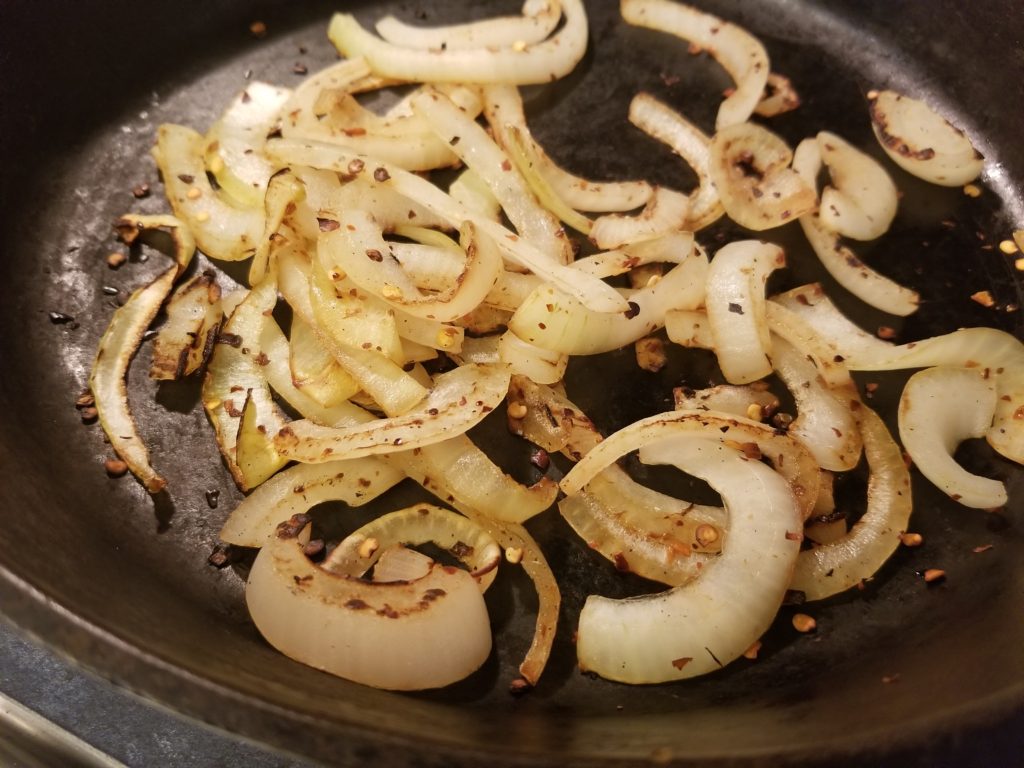
Saute them in the olive oil with the salt, pepper, oregano, and cumin until they are softened. Smells so good!


When the beans are done, add one cup to the pepper/onion mixture and smash the beans. Then add it all back to the big pot of beans. 


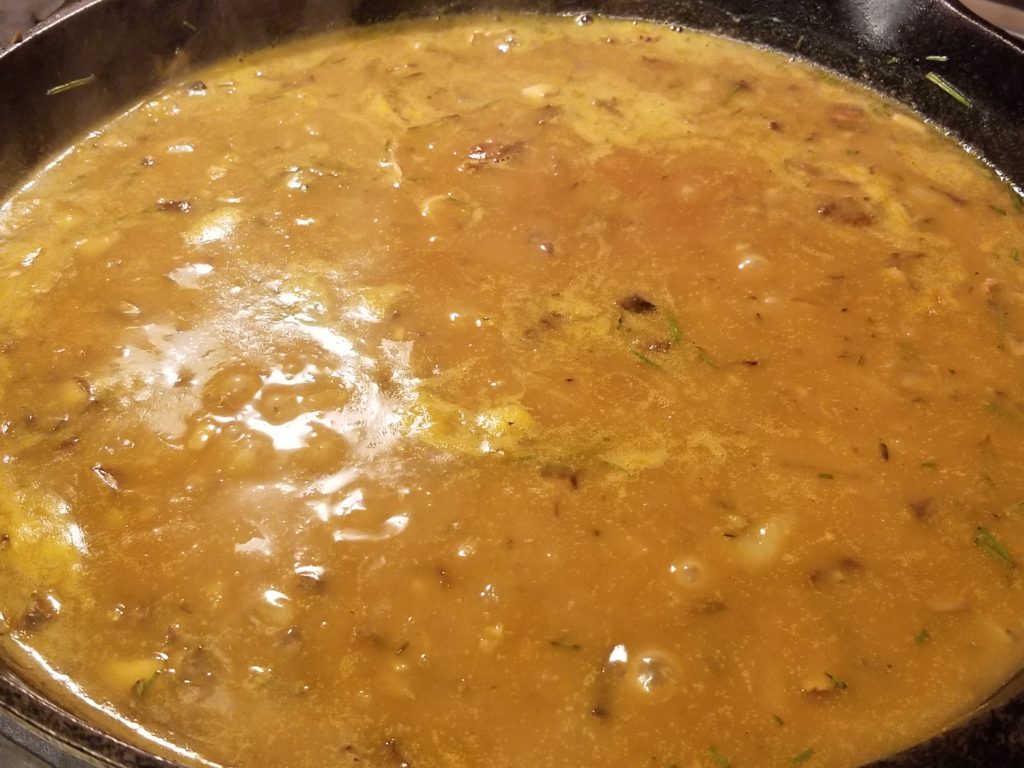
Add the vinegar and white white and simmer for a few minutes (we usually don’t wait that long, but you can!).
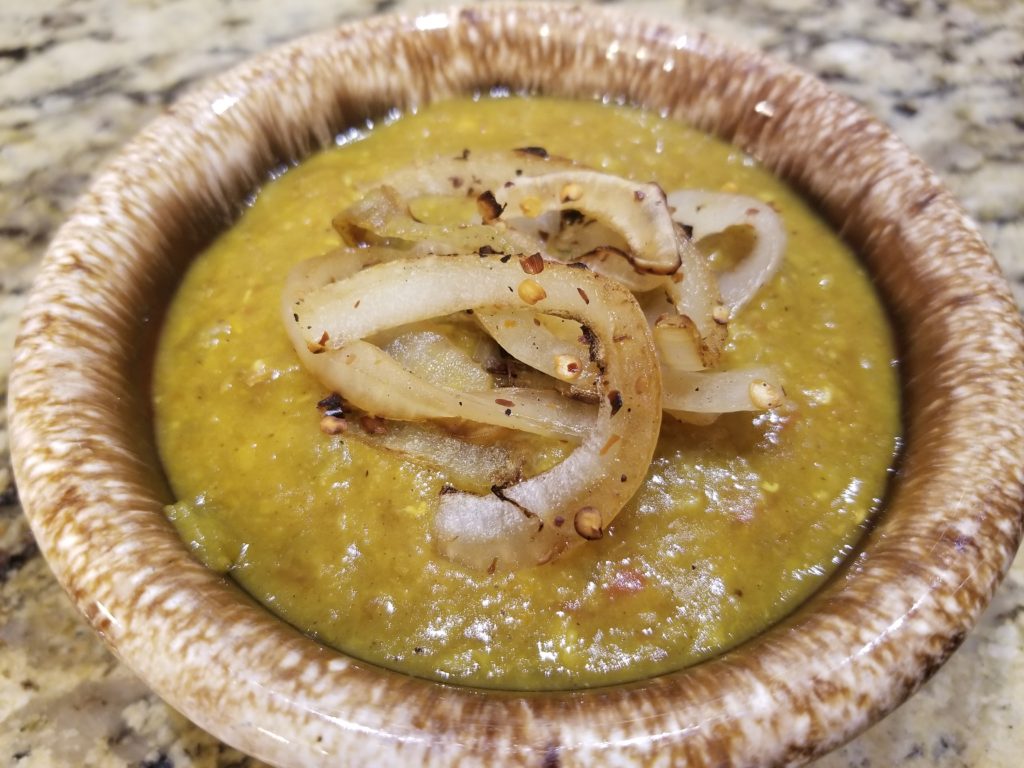
 

Enjoy!


READ MORE

Carrot Bacon!

This was a fun one! When I first saw a video making carrot bacon, I had to try it! Now, the video I watched called for an air fryer, which I don’t have. So I’ve changed the cooking instructions to use your normal oven instead!

One of the things I love about this recipe is that there’s really no special equipment. Now, I love my kitchen toys, but it aggravates me to want to do a recipe and then find out that if I don’t have some fancy machine it’ll take me waaay more time to get it done! For this one, you just need your oven, a half sheet pan, a bowl, a vegetable peeler, and parchment paper.


Before we go any further, I want to be clear: This is not bacon. It is made from a sweet vegetable, so it’s gonna taste different than bacon! But, if you’re looking for a crunchy, smoky, salty vegan option for your BLT, keep reading!

I used a purple carrot in this recipe. Now, regular orange carrots will do just fine, but the purple one makes it look more bacon-like. At the time I made this, I only had one purple carrot, so I mixed the two, and it was fine. The purple really does look better though!

Let’s get to it!


Ingredients

Two large carrots (the bigger the better), scrubbed clean (organic preferred – they did come out of the ground!)

1/3 cup maple syrup (the real stuff, not corn syrup)

1 teaspoon smoked paprika (has to be smoked)

1/2 teaspoon onion powder

1/2 teaspoon garlic powder

1/2 teaspoon liquid smoke (gives more smoky flavor!)

Freshly ground black pepper

Kosher salt for sprinkling (other salt is ok too)

Preheat your oven to 380 degrees F.

Use your veggie peeler to peel long strips of carrot. I found it easiest to do this by laying the carrot flat and pushing the peeler from one end to the other. When I got about halfway through, I flipped the carrot over and started on the other side.


Mix your marinade and pour it over the carrot strips. Let them soak for at least 3 minutes.


Lay them flat on your parchment-lined baking sheet. They can’t touch or the maple syrup will stick them together. Now, a disclaimer: I made this recipe first on a Silpat sheet and they took much longer to cook than on the parchment. So watch the strips carefully so you don’t burn them! I also found that the orange carrot cooked slightly faster than the purple. So if you use only orange carrots, check them one minute sooner than I recommend. Lastly, your oven may be hotter or cooler than mine, so watch carefully until you know what your oven is doing. These strips have to be super thin to get crispy, but this means they cook really fast (and burn quickly too!).


Bake them for 5 minutes and check them. Here’s where things can go wrong: You can take them out too soon and they’re not crispy, or you leave them too long and they burn. If they are starting to lift and crisp, take them out and gently lift them off the paper so they can get air underneath. If they are still soft, putting them back in the oven for a minute or two will crisp them. If they’re mostly crispy, just moving them off the heat will allow them to dry and crisp up. When you move them to the plate, sprinkle them with salt before they cool completely. The original recipe left out the salt and I think it makes a big difference. If you’re following a strict plant-based, whole foods (PBWF) diet or you’re avoiding salt because of your blood pressure, then leave it out, but if not then go for it!


Enjoy!


Have you seen my Weight Loss Basics class on YouTube? Episode 3 is coming out next week, so go get caught up on the first two!


READ MORE

Vegan Mushroom Gravy!

We made it through Christmas! Did you have a great time with your family and yummy food and opening gifts?


We had a wonderful Christmas morning, eating blueberry muffins my middle daughter made and seeing what gifts we all gave each other. It was a beautiful sunny day, and we enjoyed each other as the kids played with their new toys. But then I had to go to work, so I gave the heating instructions for the Christmas dinner to my husband, crossed my fingers, and headed out to the hospital


When I got home the next morning, the whole Christmas dinner had gone off without a hitch. He’d prepared the whole thing and packed all the food away neatly into the refrigerator. I’d made a gluten free cornbread stuffing for the baby and I had some of my mushroom gravy leftover in the freezer, so I was all ready to have my Christmas dinner for lunch. But they ate all the gravy! You can’t have stuffing without gravy! I was so disappointed. But then I realized that I had almost all the ingredients for the gravy and I was going to be next door to the grocery store late, so I decided a new batch of gravy was required.

Honestly, I don’t blame the kids for eating up all the gravy. It really is good enough to eat like a soup! And after you cut up the mushrooms and an onion, it’s just a little stirring and adjusting your seasonings. This recipe makes enough for a holiday meals, so now I have some in the frig and a bag in the freezer for later. I might pull it out another time to pour over potatoes or rice! Since so many of you asked for this recipe, here it is!


Ingredients

1/2 cup olive oil

8 oz baby portabella mushrooms, finely chopped

one onion, finely chopped

one tablespoon fresh rosemary, minced (can use dry if you don’t have fresh)

one teaspoon dried thyme

4-5 cups of good veggie broth (homemade if you’ve got it)

1/2 cup flour (I used einkorn to keep it low gluten)

1 tablespoon of dark miso (I used red miso)

1 teaspoon Better Than Bouillion mushroom base

1 teaspoon coconut aminos

2 tablespoons white wine (optional, but good)


First, chop your mushrooms, onions and herbs.


Then saute your onions and mushrooms in the hot oil in a large, deep skillet. Add your herbs after the veggies are softened.


Sprinkle the flour into the oil and veggies and stir until the flour is completely combined and the veggies are coated, 3-4 minutes.


Add the broth and whisk to combine. Bring to a simmer. The gravy will thicken as it cooks.

Add your miso, bouillion paste, coconut aminos and whisk to combine. Start light with these ingredients – these are your salt and you can always add more!

Add the white wine and stir to combine. Adjust your seasonings to taste and enjoy!


What was the best part of your Christmas dinner? Please share in the comments below!

READ MORE

Vegan Lunch! Tofu Jerky

If you’ve been reading along with me recently, you know that things have been a little crazy. I mean, life is pretty full and nonstop most of the time anyway, right? We have jobs and kids and school and home management and appointments and it just keeps going from there. Eating seems to get shoved in between all the other to-do’s and I’m always looking for ways to get things done better, faster, and more efficiently.

But…

While life is busy and there’s always lots to do, I’m committed to feeding myself and my family in a way that nourishes our bodies and our minds. For me, that means a whole foods, plant based diet. I’m not going for perfection – we went out for pizza (with vegan cheese!) on Sunday. But what I’m absolutely certain of is that if I don’t have good options for things to eat, I’m going to make bad choices. Like eating peanut M&Ms for lunch (yes, I’ve done that).


Peanut M&Ms – my kryptonite!


So, one thing I missed when we went plant based was having a meat protein on my salad at lunch. I used to do tuna or chicken strips. When I got rid of that, I still wanted something chewy in my salad or wrap. As I searched for options, I found a super easy substitute – tofu jerky!

Now, there are two ways to do this: One is as a snack, and the second is as a salad topping or sandwich filler. The snack is harder and more like meat jerky, but the way I make it leaves more chew than regular tofu but doesn’t make it tough. To my tofu haters: You might want to try this one. The texture is completely different than regular tofu because most of the moisture and sponginess is gone. My kiddos started making wrap sandwiches with it and now I’ve got to make more!


For those of you who have a fear of soy, I get it. The discussion around soy is fraught with concern and contains both good and bad information. Traditionally, diets that contain lots of soy have been correlated with health and longevity (think traditional Japanese food).  The problem comes in when people eat lots of highly processed and chemical filled soy. There are studies that show that a whole foods, plant based diet including soy can be used to decrease prostate cancer gene expression.

If you’ve been told by your doctor to avoid soy products, then by all means do not eat this recipe. But when it comes to soy for most people, I have a few recommendations. First, only buy organic soy. This means that your soy isn’t genetically modified or treated with glyphosate (an herbicide called Round Up that’s linked to allergies, asthma and cancer, used on most nonorganic soy, corn and wheat). Also, eat soy that’s the more traditional, fermented and less processed forms like tofu, tempeh, and edamame instead of highly processed soy like milk.


When I first started looking for recipes on how to make this jerky, I found lots of recipes that had many ingredients to make a savory marinade. While those might be good, I was looking for something that was a lot less work but still tasted really good. So after I tried a couple of homemade marinades, I made a batch marinated in a bottled barbeque sauce I like. And voila – easy and delicious tofu jerky! Ready to make it? Here we go!


Ingredients

Barbeque sauce

Extra firm block tofu


If your tofu is stored in liquid, drain it and press any remaining liquid out of the block. If you find the ones wrapped without liquid, just skip to the next step.

Pretty dry…


Cut the tofu into strips. I cut them half length so they fit in the bag.


Put the strips into a zip top bag and pour the sauce over them, shaking the bag to coat. Let them soak in the frig for at least two hours. Overnight works too!


If you have a food dehydrator, dry the strips on a mat for four hours at 140 F. I leave a little extra sauce on them. If you don’t, dry them in the oven on the lowest heat (usually about 175 F) for 2-3 hours.

Before the dehydrator…


After the dehydrator…


Since these aren’t completely dry, I don’t leave them on the shelf like real jerky. Store them in the frig and use them cut up over a salad or stuffed into a tortilla wrapped around lettuce, tomato, pickles and vegan mayo. Delicious!


My working lunch between patients – a handful of salad from last night’s dinner, tofu and dressing. Delish!


How do you get quick healthy meals? Please share in the comments below!


READ MORE

Get Your Greens! Grilled Bok Choy

It’s time for a new recipe!


I was sitting around and talking to one of the surgical assistants at the hospital this week while I was waiting to start a cesarean. She follows this blog and reminded me that I hadn’t done a recipe in a while. So Toya, this one’s for you!


I love my greens. All of them. Kale, collards, brussels, cabbages, lettuce, asparagus – I could just keep going, but we need to get to the recipe! I’m convinced that if you don’t like a particular veggie, you probably haven’t had it prepared well yet. One favorite in my kitchen is bok choy. It’s fresh and juicy and can be used raw or cooked, in salads, and in stir fries. I love to eat bok choy raw in and asian salad with cabbage and nuts – Trader Joe’s has an easy bagged version. Raw veggies generally provide more of the antioxidants and vitamins that can be destroyed in cooking. There are some fruits and veggies that cooking actually helps make some of their benefits more bioavailable (like lycopene in tomatoes, fiber in broccoli for cholesterol reduction). So I eat lots of raw food, and adding cooked veggies on top of my salad mixes it up and keeps things interesting!


Since it’s getting cold and I like to have more cooked food in winter, I’m cooking the bok choy today. To keep the most health benefits of the vegetables, you want to lightly cook them, no matter how you do it. If you boil veggies (not my favorite), lots of the benefits of the veggies end up in the water. And since I live in Georgia and the sun is out, I can use my grill! I love my grill. I’ve been known to grill through the winter, even once or twice in a light rain! So I’m going to grill this bok choy, and we’re gonna flavor it up and make it savory and delicious.


Ingredients

1-2 heads of bok choy, 4 if using baby bok choy

1/4 cup olive oil and butter, melted (I used vegan butter)

1 teaspoon garlic paste or fresh finely minced garlic

1/8 teaspoon paprika

1/2 teaspoon seasoned salt

fresh ground black pepper to taste


Preheat your grill on high heat.


Trim and wash your bok choy. Just trim off the ends so the leaves stay attached and use a brush to wash off any dirt.

Just the ends…


Then cut them in half longwise.


Melt your butter and oil with the spices and brush on the surface of the bok choy.


Grill over high heat, allowing grill marks to form on one side and flipping to the other for 2-3 minutes. You don’t want to completely burn the leaves or overcook the juicy white ends.


After grilling, brush on the rest of your oil mixture and enjoy!


This was lunch the day I wrote this post – delicious!


What’s your favorite winter greens recipe? Please share in the comments below!


READ MORE

Fat Free Dal Tadka

Ever since our family started on this plant based eating plan, I’ve been fooling around with recipes, trying to find some staples that work in our regular meal rotation. It hasn’t been easy.


You notice I’m not saying we are eating a vegan diet? That’s on purpose. A vegan diet can be very healthy, but it doesn’t have to be. You can absolutely be a junk food vegan! And for me, even if I eat non-animal foods, if I move into processed food land, I can put on weight at a speed that is truly remarkable!

So I’m trying as best as I can to stick to a whole foods, plant based, low fat (for me) eating style. The kids don’t need the low fat part, but that’s easy to adjust for them. But a plant based recipe that has great flavor, is low fat, and doesn’t have a page long list of ingredients  – now that’s been a challenge. The Black Lentil chili recipe is a good one. And I’ve found another lentil recipe that is basically a dump-and-stir, after you chop an onion and a tomato. 


I like lentils. They’re high in protein (one answer for non-vegans who want to know where you get protein on a plant based diet), low in fat, have lots of complex carbohydrates and fiber, and provide folate (especially good in pregnancy) and magnesium. They’re also delicious! I happen to love Indian food, but if you’ve ever tried to make a traditional Indian food recipe, there are a thousand spices in each recipe. That’s probably why it’s so good! But I don’t know how to do that kind of cooking quickly and easily, so I need a quicker option. Also, Indian food uses a lot of oil (usually ghee – not vegan), and since I’m following more of a Forks Over Knives plant-based plan, I wanted a low fat option. I also really like this recipe because all the heat is in the onion topping. I like fiery food, but my youngest does not, so this is a meal I can make for the family and enjoy without having to add hot sauce (which is what I usually do). This one comes from Fat Free Vegan, and I loved it!


Here are some short cuts for this recipe. First, use a pressure cooker (you know I love my Instant Pot!). You can do this on the stove top, but you’ll need at least 30-45 minutes for the peas to soften, so use the pressure cooker if you’re trying to make this fast. Second, get pre-prepped garlic and ginger. Yes, the fresh is delicious, but this is almost as good and is so much faster. Also, you need a garam masala spice blend, so make sure you have this before you start. Let’s get cooking!


This recipe doubles easily if you want to freeze some for another day.


Ingredients

1/2 cup split red lentils (masoor dal)

1/2 cup yellow moong dal (splint mung beans) or yellow split peas (I used this), or another 1/2 of the red lentils

3 cups water

1 large tomato, chopped

1/2 onion chopped, 1/2 onion sliced

3 cloves garlic, minced (or 3 teaspoons of garlic paste

1 teaspoon fresh ginger root, minced (or one teaspoon ginger paste)

1 teaspoon cumin seeds

1/2 teaspoon turmeric

1/2 teaspoon salt (or to taste)

1/2 teaspoon garam masala (or more to taste

1/2 teaspoon crushed red pepper flakes (or to taste!)


Put the lentils and peas, water, tomato, chopped onion, ginger, garlic, cumin seeds, turmeric, and salt in the pressure cooker and cook on high pressure for 10 minutes. If you’re cooking on the stovetop, bring to a boil, then cook on low covered for at least 30 minutes until then lentils are soft, stirring frequently and adding more water if needed. In the pressure cooker, let the pressure release naturally for ten minutes, then quick release. 


While the lentils are cooking, put the sliced onions in a dry skillet and cook, stirring often until they begin to brown. Fat Free Vegan recommended a nonstick pan, but I don’t use coated pans, so I used my dry cast iron skillet and they browned nicely. Add the red pepper flakes and cook until the onions are soft and a little browned at the edges.


Check the lentils to be sure they’re soft and cooked through. Then add the garam masala and stir vigorously to make the lentils creamy. Add water if it’s too thick. Adjust your seasonings (add salt or more garam masala). Serve over rice and top with the onions. A side salad would be good here, especially if you made the onions spicy. Enjoy!


READ MORE

Black Lentil Chili

Yes, it’s 95 degrees outside and I’m writing a post on chili! I know, that seems totally out of season. And it is, but since our family became plant based, this recipe has become a staple. This is a recipe that when I make it, no one misses the meat – and for chili, that’s saying a lot!


Lentils are a great source of protein, the highest of all the legumes. They contain lots of iron and calcium, and because of all the fiber and antioxidants in lentils, they are great for heart health. They’re also quick cooking, colorful, and delicious! They’re also inexpensive, so in addition to being a great alternative to meat dishes, they’re also a cheaper option. This recipe is made with no added fat, so it meets the criteria of a Forks Over Knives meal – plant based, whole foods, and low fat, promoting healing and reversing heart disease and diabetes. This chili is made from two kinds of lentils, black caviar and red. The black lentils are the texture, and the red ones break down to give thickness to the pot. The genius who created this recipe (Susan Voisin of blog.fatfreevegan.com) put this recipe together in an Instant Pot, one of my favorite appliances. But, it can be done on the stove top, it’ll just take a little longer. Either way, it’s worth it. We’ve had it with cornbread, over tortilla chips as nachos, stuffed in a potato, and with a side salad. It’s delicious and filling and I think I’m gonna make a double recipe next time!


Ingredients

1 large onion, chopped

1 large bell pepper, chopped, any color (yellow is pretty)

1 tablespoon garlic puree (or 6 cloves fresh garlic, minced)

1 tablespoon chili powder

1 teaspoon ground cumin

1 teaspoon oregano (mexican if you have it – I didn’t)

1 teaspoon smoked paprika

1/2 teaspoon chipotle powder (more if you like more heat)

1 cup black beluga lentils, rinsed and picked over

1/4 cup split red lentils, rinsed and picked over

1 quart box (4 cups) of vegetable broth

1 16 oz can of fire roasted tomatoes

1 teaspoon coconut aminos (you can use soy sauce or tamari, but they have higher sodium)

1 teaspoon balsamic vinegar

1 teaspoon salt (optional, or to taste)


Instructions

First, prep your veggies and spices. Once you chop the onion and pepper, rinse the lentils, and measure the spices, the rest is almost a dump-and-stir recipe. 


Saute your onions in the Instant Pot first for a few minutes until they begin to brown (same on the stovetop). Then add the peppers and garlic for a couple of minutes. Add a little water if they stick.

Add the lentils and the dry spices and cook for another minute or so. Add the tomatoes and veggie broth, stir, and lock the lid in place (if you’re cooking on the stove, put a lid on the pot and cook for up to 30 minutes, until the lentils are soft). Pressure cook on high for 10 minutes, then allow a natural release for at least 10 minutes. If you can’t get back to the pot that fast,  it’s ok – I’ve left it for 45 minutes past the cooking time and it’s been fine. If you’re in a hurry, quick release the pressure after the 10 minutes.


Add the vinegar and coconut aminos and salt if you need it (I didn’t, and I like salt). I might have put an extra dash of the coconut aminos though). If the chili is too thick, add more broth or water.

Serve with fresh cilantro (my favorite!) or parsley and enjoy!


What’s a staple recipe in your family dinner rotation?  Do you have a meal that’s always a winner? Please share in the comments below!

READ MORE

All About The Sauce

Really, it’s all about the sauce!


No matter what you make, it’s the seasonings that make it taste so good. Think about it: When you have a hamburger, or tacos, or a pizza. it’s what’s on top that makes the difference. Whether you top with pickles or salsa, aioli or vinaigrette, your flavors are in the sauce!

So when I made to the move to a whole food, plant based diet, I knew that one way to make this a delicious and fun way to live would be how the food was prepared. Yes, carrot sticks and roasted potatoes are delicious, but if you have a nice dip for the carrots or some fresh rosemary over the potatoes, you’ve really got some good eats! I find that one of the things that holds people back from pursuing a plant based diet is the thought that the food won’t be as good. There’s almost this idea that meat has some special wonderful flavoring that makes the meal. But if you really think about it, you know that isn’t true. An unseasoned piece of meat would be awful – it’s all in how you prepare it.

The real problem is that people are creatures of habit. We know how to quickly season some chicken wings or burgers. But learning new ways of preparing to eat can be intimidating and that keeps us from trying new foods. So this week, I’m going to give you two sauce recipes to get you started. In 20 minutes, you can have two sauces made for the week that you can use as toppings, salad dressings, or flavorings for your plant based meals. Of course, you can buy some, but it can be a challenge to find a vegan sauce that doesn’t have added sugar (Trader Joe’s has three good ones). But if you make yours, you know exactly what’s in the sauce and know the quality of your ingredients.


Change is hard. When I’ve tried preparing different food styles, the time I’ve had to spend learning seemed like too much compared to when I just make what I know.  And, if I’m trying to be “good”, I feel restricted about all the things I can’t eat. But instead of thinking about what I can’t have, I’ve learned to figure out what I can have. When I want chocolate, I looked for recipes on raw vegan cacao desserts – and found some easy ones!  Once I change my mindset, going forward is so much smoother – I just execute my plan!


This week we’re going to make an Asian inspired pad Thai sauce that you can use on noodles, in veggie rolls (like the ones in the picture above), or on a salad. Chop a bunch of veggies, throw them over a bed of lettuce, top with some tofu cubes and drizzle with this sauce, and you’ll think you ordered an Asian salad from your favorite restaurant! I modified this recipe from a un-cook book called Raw and Simple, a wonderful book on raw food philosophy and recipes. This recipe calls for tamari, a non-wheat soy sauce alternative, but I prefer coco aminos because it has about half the sodium content of soy sauce  and tamari and has no wheat, but still tastes very much like soy sauce. I also left out the stevia because I didn’t think it needed to be sweetened, but a couple of drops of stevia or monkfruit extract could be added if you want!


Asian Almond Butter Dressing

1/2 cup almond butter (unsweetened)

1/4 cup water

1/4 cup coco aminos

2 tbsp rice vinegar

2 tbsp red Thai curry paste (yes, a little unusual, but absolutely worth buying!)

one clove of garlic

1 tbsp ginger paste (or fresh grated ginger or ginger juice, but the paste is easiest!)

1/2 tsp crushed red pepper (optional, but good)

2 tbsp agave nectar or a few drops of monkfruit extract or stevia (optional)


First, gather your ingredients.


Put everything in the blender.


Blend and store in a clean jar or bottle and enjoy!


Our second sauce is a Mexican inspired sauce, so if you don’t want Eastern flavors, you can go south of the border to shake up your meals! You can drizzle it over rice and beans, or use it over fresh greens, avocados, grilled onions and peppers, topped with corn, tomatoes and jalapenos for a Mexi-Cali salad. Or for another low carb option, use a coconut wrap and fill it with a cauliflower rice saute, flavored with taco seasoning and this sauce, and topped with more grilled peppers and onions and some plain non-dairy yogurt and hot sauce to finish it up. This sauce recipe came from a website called thekitchn.com, and they used it over a veggie saute wrapped in chard leaves. Sounds good, right? Well, let’s make some sauce!


Mexican Cumin-Lime Dressing

This recipe makes a small jar’s worth, so if you like it, double or triple the recipe!

1 tbsp fresh limes juice ( 1-2 limes)

1 tsp lime zest

1/4 cup extra virgin olive oil

1-2 scallions minced (or in larger chunks if you’re using a blender), white and light green parts

1 tsp ground cumin, more to taste

1/8 tsp crushed red pepper flakes

1 tbsp honey

1/2 tsp fine grain sea salt


First, gather your ingredients.


Then put it all in the blender. If you don’t have one, you can put all the ingredients in a jar with a lid (like a mason jar).


Then blend (or shake hard!), and store in a a clean glass jar. Enjoy!


What are your favorite sauces and seasonings? Let me know and I can put together more quick ways to get these in upcoming posts. How do you flavor up your favorite vegetables? Please share in the comments below!


READ MORE

Raw Cucumber Gazpacho

You asked, so here it is! Don’t blink – this one is quick and easy, so there aren’t too many instructions. Besides, I’m going to a conference on Plant Based Prevention of Disease, so I have to go pack!


This recipe is flexible, so don’t be afraid to adjust it to your needs. Nut free? Use coconut milk. Like nuts? Use a cup of raw soaked cashews instead of the avocado. Do you want it a little more green? Add a handful of spinach. And absolutely fiddle with the seasonings until it tastes the way you like. I like cilantro and basil, so I add it to the soup and use it as the garnish too. Also, a word of caution: Until you know how things taste, add the strong flavor in a little at a time. For example, if the recipe says 1-2 cloves of garlic, use one and taste, then add the other if you want more. There’s no cooking here to mellow the flavors and you can’t take it out, so little by little is best. It’s no fun to dump a blender full of food because it’s over-seasoned. Now let’s get started!


Ingredients

2 whole cucumbers

1/4 cup almond milk

2-3 tablespoons fresh lemon juice

1-2 whole avocados, depending on size (or one cup of raw cashews, soaked overnight)

1-2 cloves of garlic

1 tbsp white miso (it’s good, but you can skip it if you don’t have any. A dash of tamari, coconut aminos, or soy might be a quick sub)

2-3 romaine leaves or a handful of spinach

1 tbsp maple syrup (optional – can help if the greens are a little bitter to taste, but it’s not required)

4-5 mint leaves

a pinch of crushed red pepper

salt and pepper to taste

Toppings: drizzle of good EVOO, fresh cracked black pepper, sprinkle of sea/pink/black salt (whatever you like), basil and/or cilantro leaves, cucumber slices, sprouts or pea shoots, slivers of grape tomatoes, pesto (not raw, but tasty!)


First, gather your ingredients. I added the lettuce leaves to my blend.


Then slice your cucumbers longwise, scoop out the seeds with a spoon, and cut into big chunks. If you’ve got a high powered blender, you don’t have to cut much of anything! Put everything in the blender except your toppings. If you’re using cashews instead of avocado, drain and rinse the cashews and add them to the blender with everything else.

Blend away!


This soup is best cool, so if you can wait, let it sit in the frig for a couple of hours. Then drizzle, top, and serve!


What do you think? How do you feel after eating this soup? Want more raw recipes? Let me know in the comments below!

READ MORE

Brussels Sprouts – Three Ways

Ah, the much maligned brussels sprout – the vegetable we love to hate! But it doesn’t have to be! As with many vegetables, many of us have had bad experiences in childhood with mushy, overcooked, bland brussels sprouts. And because they’re related to the cabbage family, they have a sulfurous stinky smell if they’re cooked too long. Doesn’t sound like something worth eating, does it? My philosophy is that if you don’t like a particular vegetable, then it probably hasn’t been prepared well for you. Except okra. I just can’t do slimy. But I’ve been known to even use okra as a thickener for soup, so I guess I don’t have an exception…


Of course, I have to say that brussels sprouts are nutritional powerhouse! They are big on fiber, vitamins C and K, antioxidants, and other cancer fighting compounds. But if they don’t taste good, you might as well just take supplements and chew some cardboard. The good news is that it’s easy to make these yummy little cabbages taste great, so keep reading…

The negative reputation of Brussels sprouts may be won honestly, but it doesn’t have to stay that way! It’s actually very easy to prepare Brussels sprouts in a fast and delicious way. So today, I’m going to share three quick and yummy ways to make your Brussels sprouts. Ready? Let’s get cooking!


First, you need the Brussels sprouts. I bought them whole, but you can buy them shredded in bags to save a step. I used about a pound of sprouts for these three recipes. They also come precut and seasoned at some stores, and all you have to do is cook them!

We’re going to make roasted brussels first. Simple and easy!


First, trim the dry ends.


Then take half and cut them in half.


Season with olive oil, salt and fresh ground pepper. Don’t skimp on the oil!


Arrange on a baking sheet and roast for 10-12 minutes at 450 degrees. Yum!


Our second recipe will use raw shredded brussels. After you’ve cut the dry ends off, shred the brussels sprouts. I used my food processor, but if you don’t have one, you can buy them shredded or use a sharp knife to shred them.

This recipe is based on a kit I bought one day from Trader Joe’s. When they were out of it, I decided to make my own. You will need 2 cups of shredded brussels, a vinegarette dressing, 2 tablespoons of chopped hazelnuts, and 2 tablespoons of parmesan cheese.


Chop your hazelnuts. I put my whole nuts in a ziplock and smacked them with the back of a heavy spoon. Round hazelnuts tend to run away from a knife!


Heat 2 tablespoons of cooking oil in a pan on medium-high heat and add about 2 cups of shredded brussels to the pan. Saute for 1-2 minutes.


Add 2-3 tablespoons of vinegarette dressing (I used a champagne vinegarette, but Trader Joe’s used a lemon vinegarette. I couldn’t find one.). Stir for 1 minute.


Turn off the heat, add fresh ground black pepper and 1-2 tablespoons of shredded parmesan cheese. Add hazelnuts and serve!


Our third recipe also uses 2 cups of shredded brussels, but this time we’re going to use them raw for a tangy slaw! You’ll need about 2-3 cups.

First make your dressing. I used 2 tablespoons of mayo, 1 teaspoon of dijon, 1 teaspoon of sriracha, one clove of minced garlic (you can use garlic powder, but the fresh really is better!), 1 tablespoon of apple cider vinegar. Stir it up!


Throw the shredded brussels on top and stir well.

Add your fruit and nut of choice. I used dried cherries and almonds (and I added sunflower seeds because I had some!), but you could use cranberries, walnuts, white raisins, pecans, whatever you like!


Serve and enjoy!


So these are three of my favorite easy ways to try Brussels sprouts, all fresh and delicious! Let me know what you think!


Have you had bad veggie experiences that have made you refuse to eat certain vegetables? Tell me your yucky veggie stories in the comments below!


READ MORE