Skip to Content

Category Archives: Recipes

Fall Vegetable Soup

I love fall!


Really, it’s my favorite season of the year. I love the crispness of the air, the change in the color of the leaves, the sound of the crunch of leaves underfoot, the earthy smell of the leaves on the ground. I love wearing all my snuggly sweaters. I love hot tea by the fireplace on chilly nights (in Georgia we’re not there yet, but I’m looking forward to it!).


Fall is also soup season. When the weather cools down, I find myself wanting more warm and nourishing soups instead of salads. I have so many soup recipes I can’t even count! My newest favorite is a vegetable soup I made a few weeks ago when I wanted a bowl of veggies but didn’t want a salad or stir fry. The nice thing about a veggie soup is that you can make it out of whatever vegetables you want to clear out of the fridge. I’ll show you what I did, but you can modify it to fit what you have. If you want a tuscan flavor, you add diced canned tomatoes and italian seasoning. An asian soup could be made with soy and miso (and add tofu, snow peas, and seaweed – I might try this next!). Whatever you feel like tasting, you can use your veggies to carry it to your mouth!


I have a couple of tricks and tips to make this recipe easy and a party for your mouth! First: cheat. If you’re short on time (and who isn’t?), buy precut veggies. Traditional soup base is onions, celery, and carrots called mirepoix. Trader Joe’s sells this all ready to go. It’s not organic, but if I can stifle my purist tendencies, this saves a bunch of time! Second, the biggest difference between this and an ordinary veggies soup (other than you can customize it) is that you add fresh veggies after the soup is done. Kale, spinach, raw peas, green onions, and fresh herbs (think basil or cilantro). Add these after the soup is cooked through and these will be fresh and crunchy but warm and a little wilted by the hot broth. Yum!
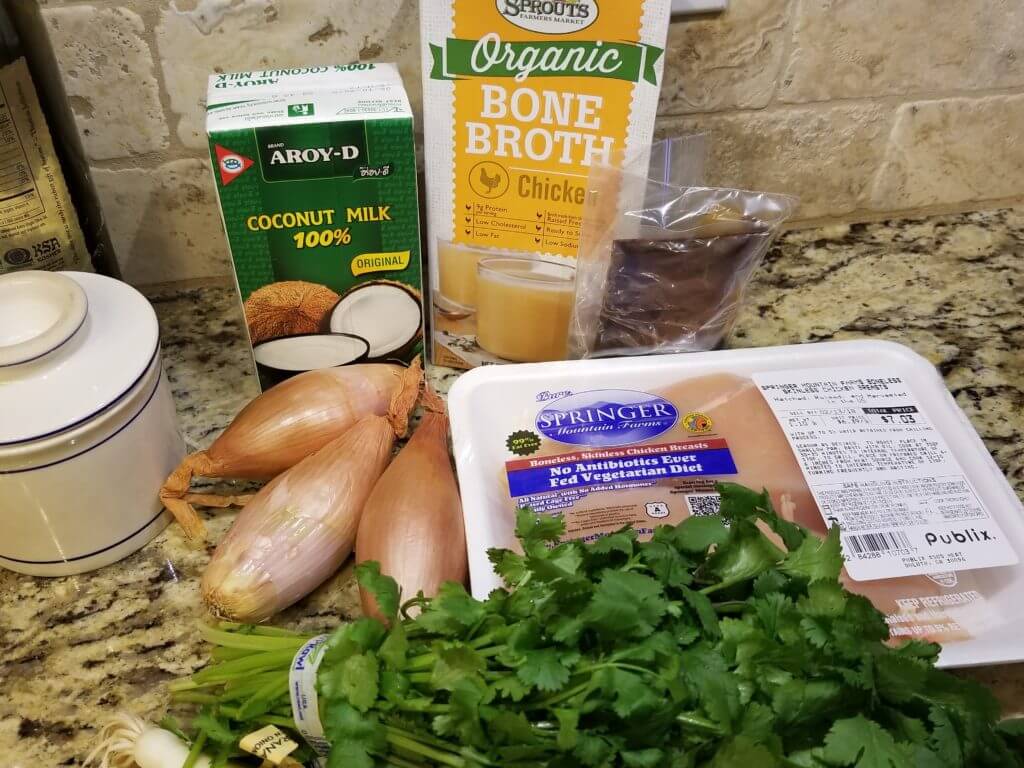


Ingredients:

olive oil and butter (or ghee)

2 carrots (diced)

2 ribs of celery (diced)

1 onion (diced) – or just use the mirepoix and skip the last three!1 leek (quartered and sliced thinly)

salt and pepper

1 tsp dried spices (italian, parsley. I added fennel seed which is great for digestion and tastes wonderful, but it’s optional)

3 minced garlic cloves

1 can diced tomatoes (fire roasted ones are nice!)

4 cups of vegetable broth

1/2 cup fresh peas

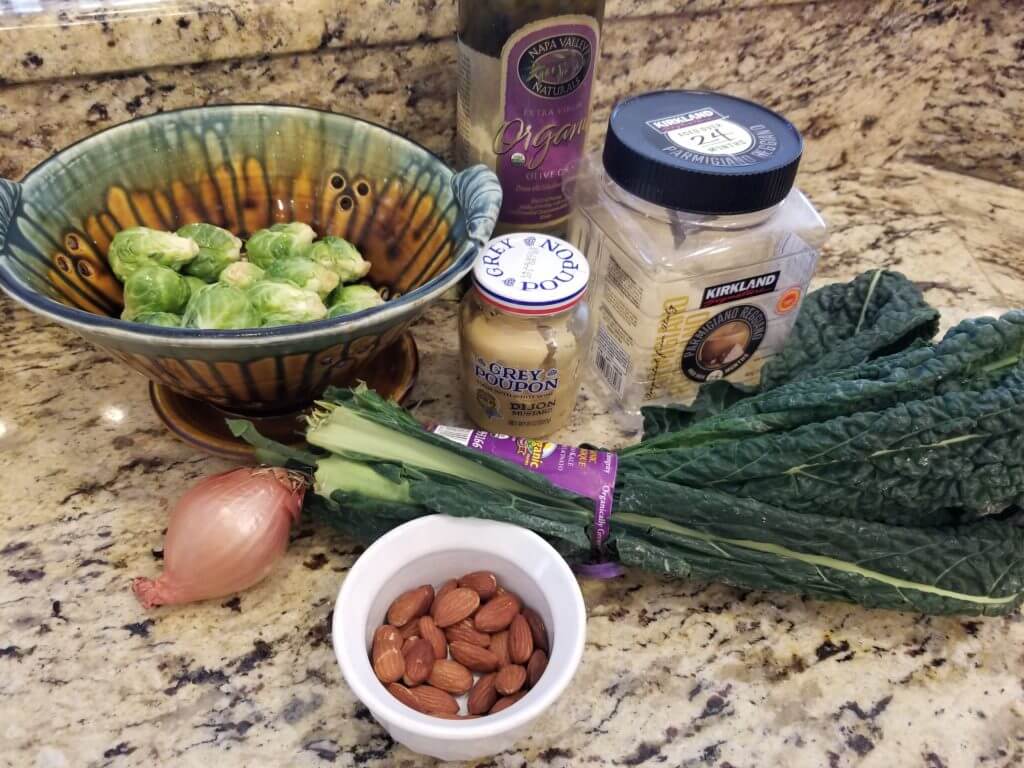
1 cup chopped fresh kale or spinach

1/2 cup corn kernels

1 tbsp fresh herbs (parsley or cilantro)

squeeze of lemon


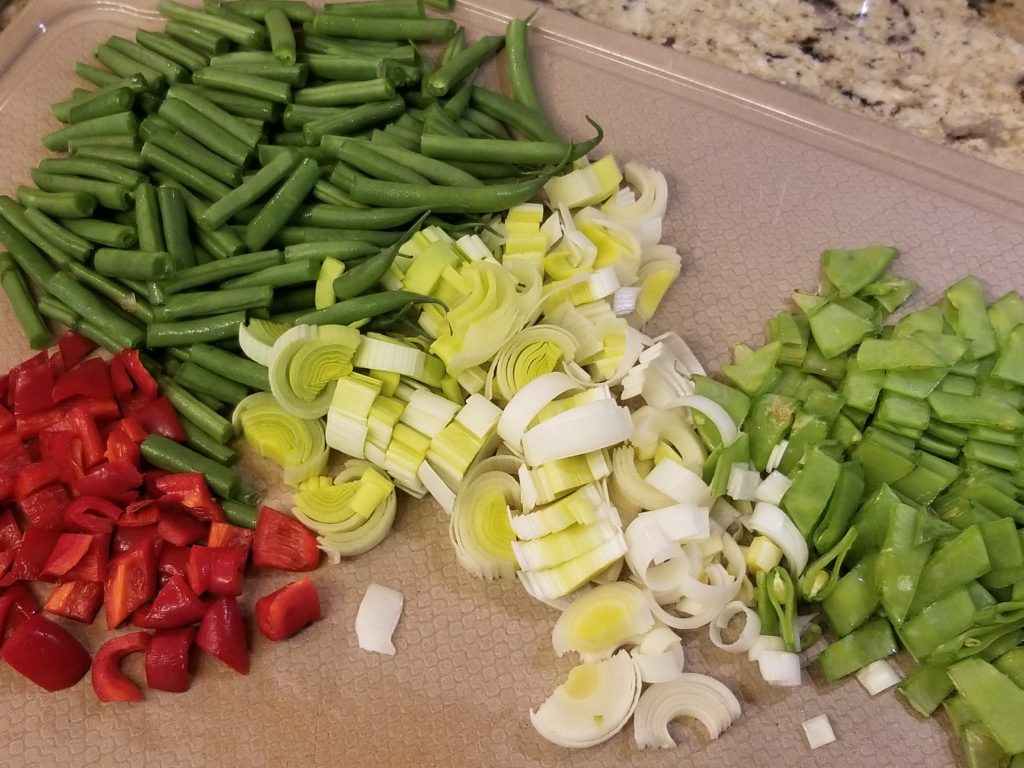
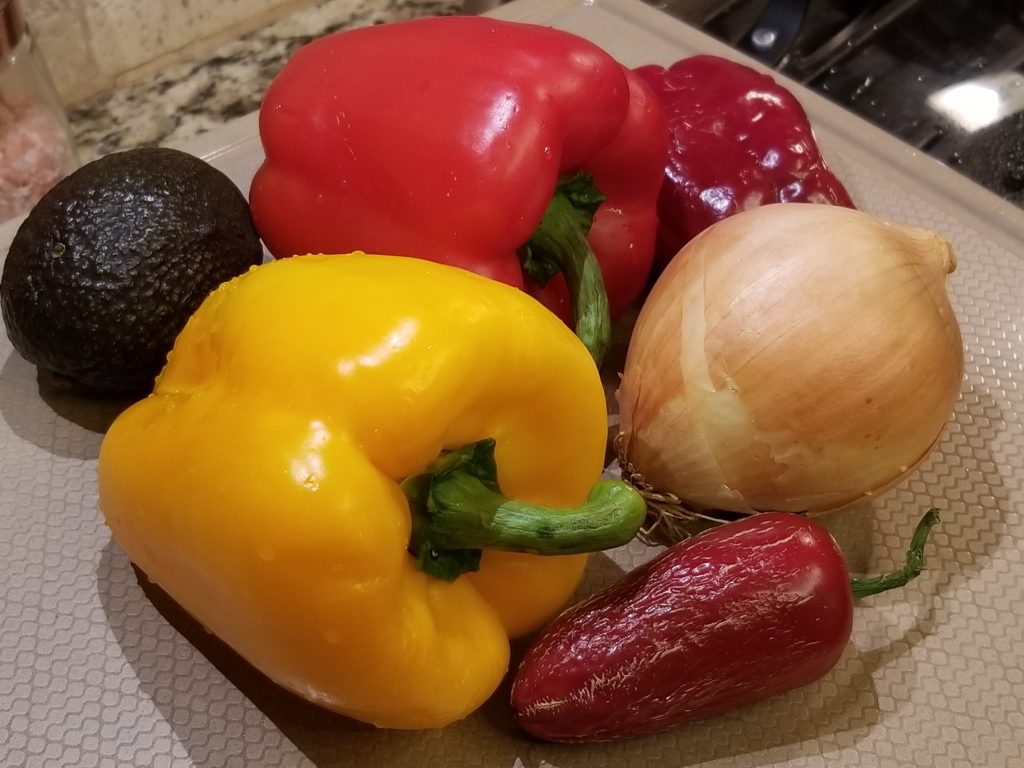
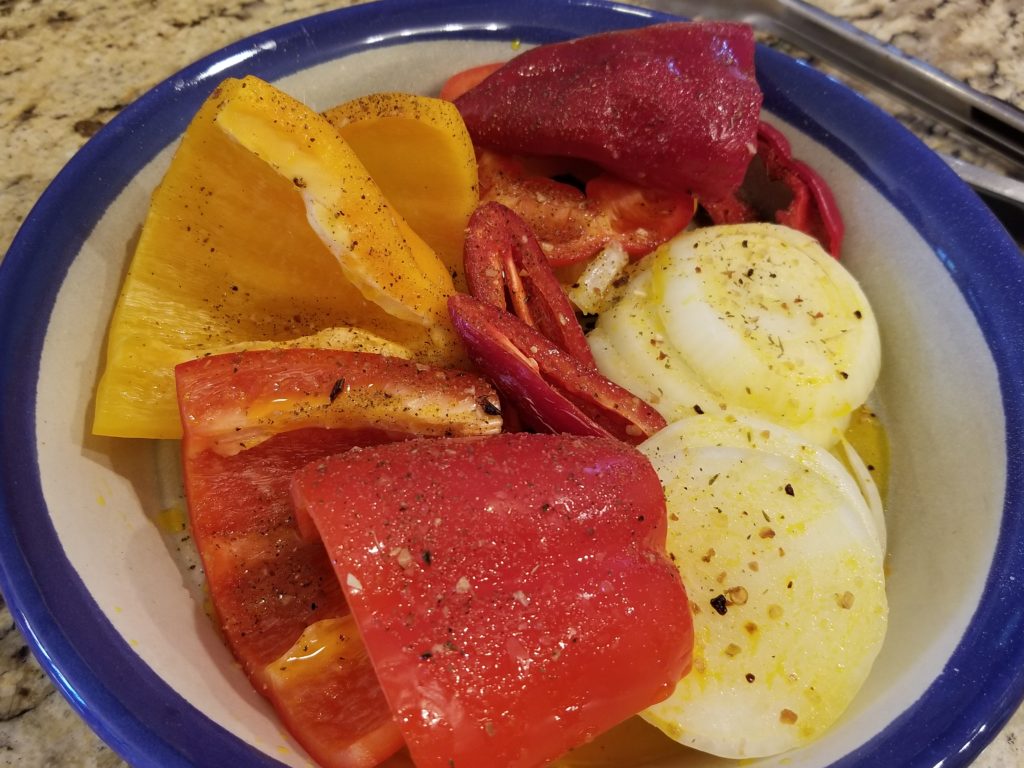
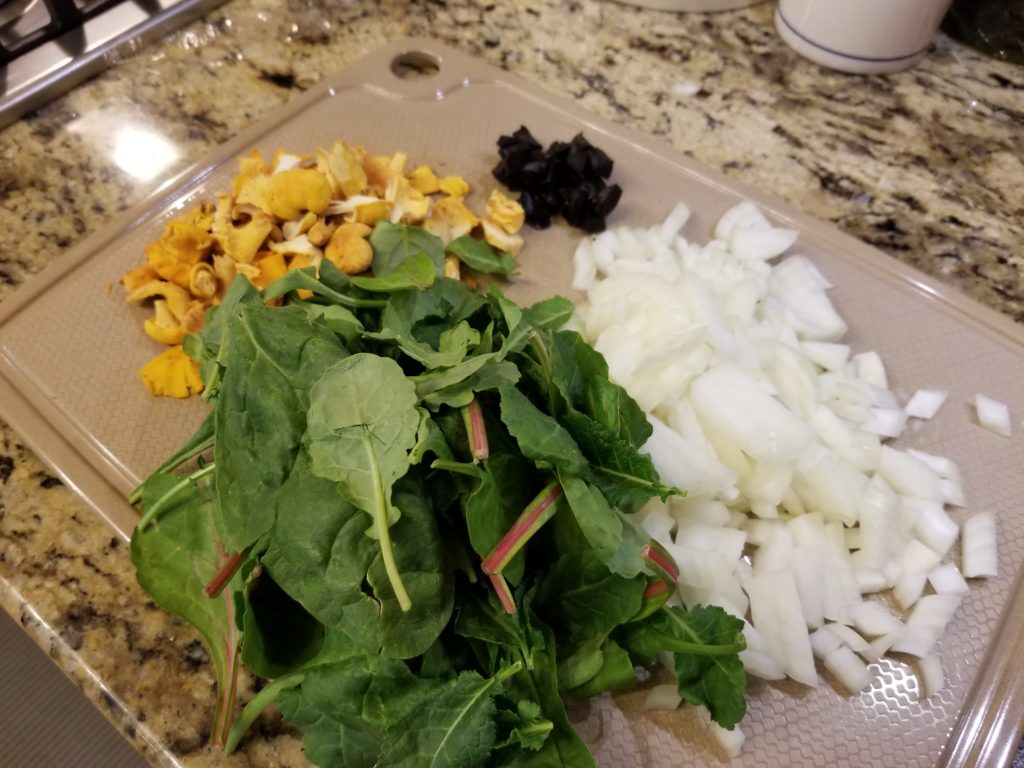
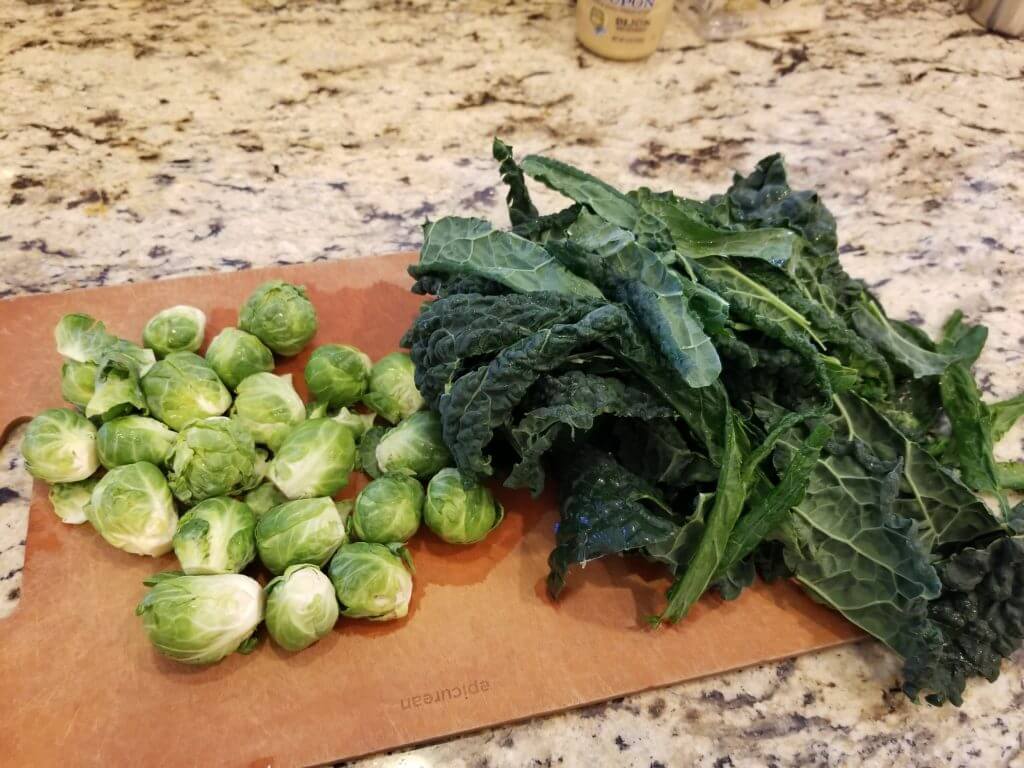
Chop up all your veggies first.


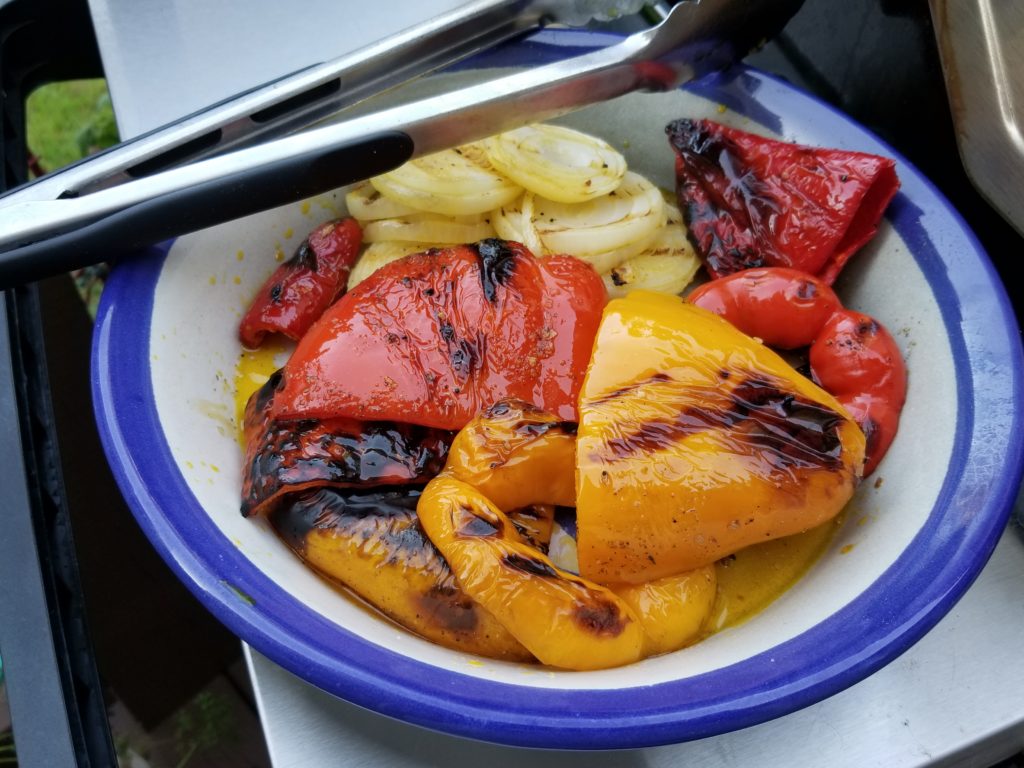
Put your large soup pot on medium head and add your oils. Add the leeks, mirepoix, and any other hard veggies you’re using (parsnips, potatoes). Season with salt and pepper and cook for 3-4 minutes.


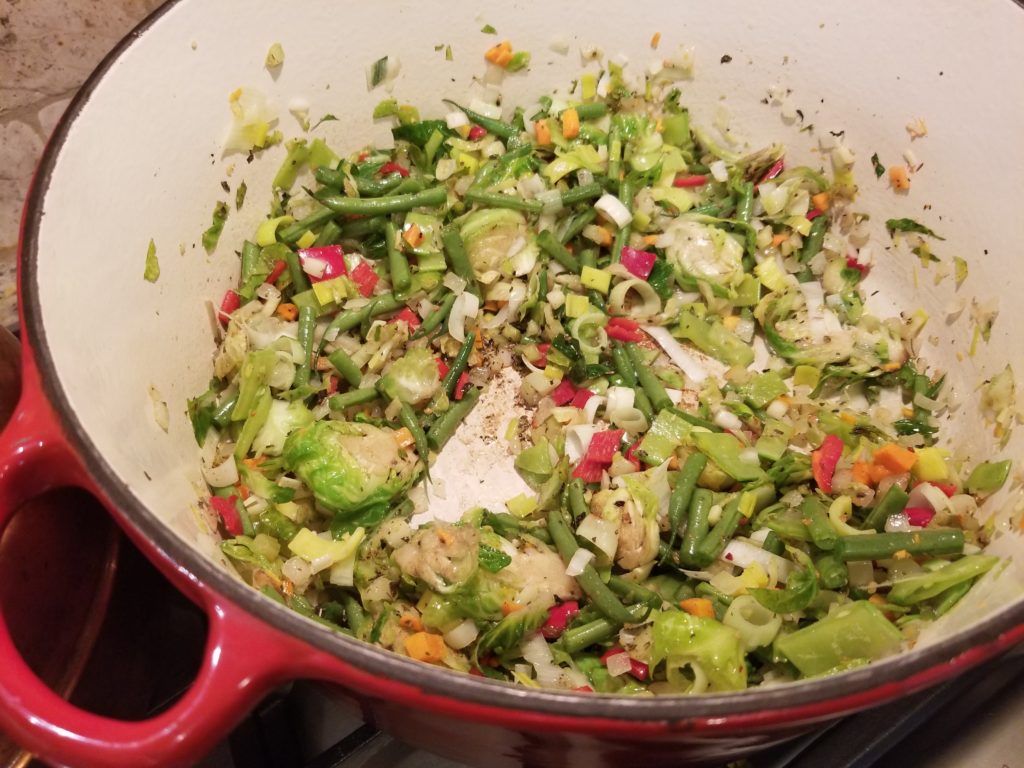
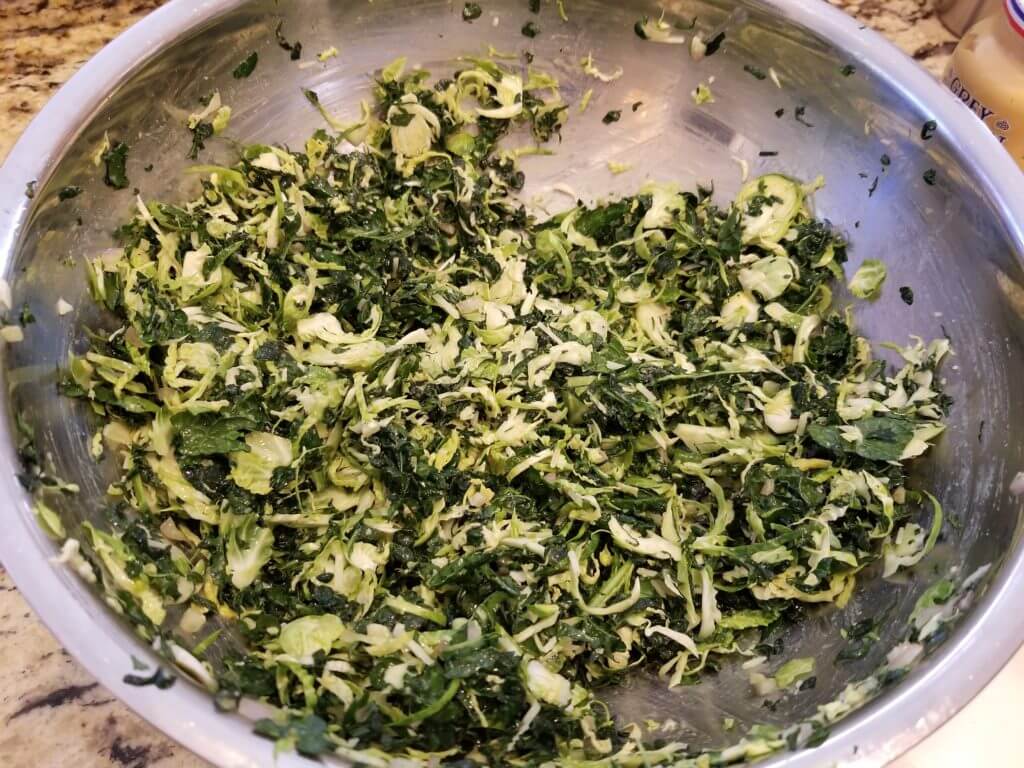
I added some sliced brussels I had in the crisper too!


Add the dried seasonings and garlic and stir together. Add the tomatoes and broth and bring to a boil, then reduce the heat to a simmer for about 15 minutes. You don’t want the veggies mushy!


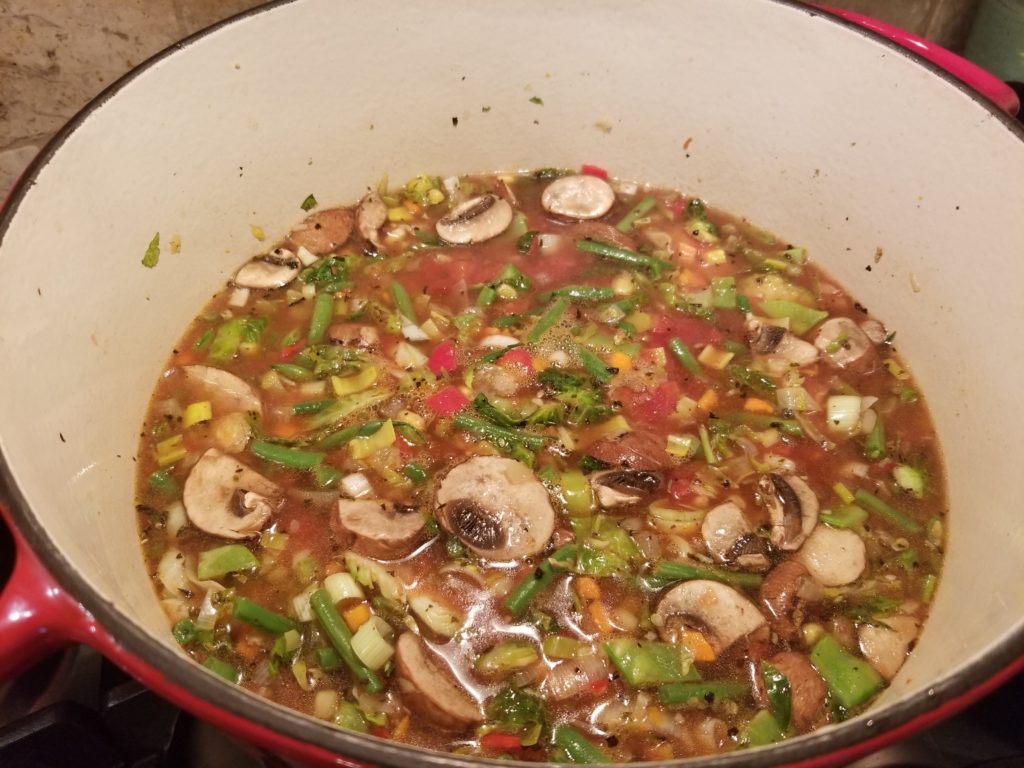
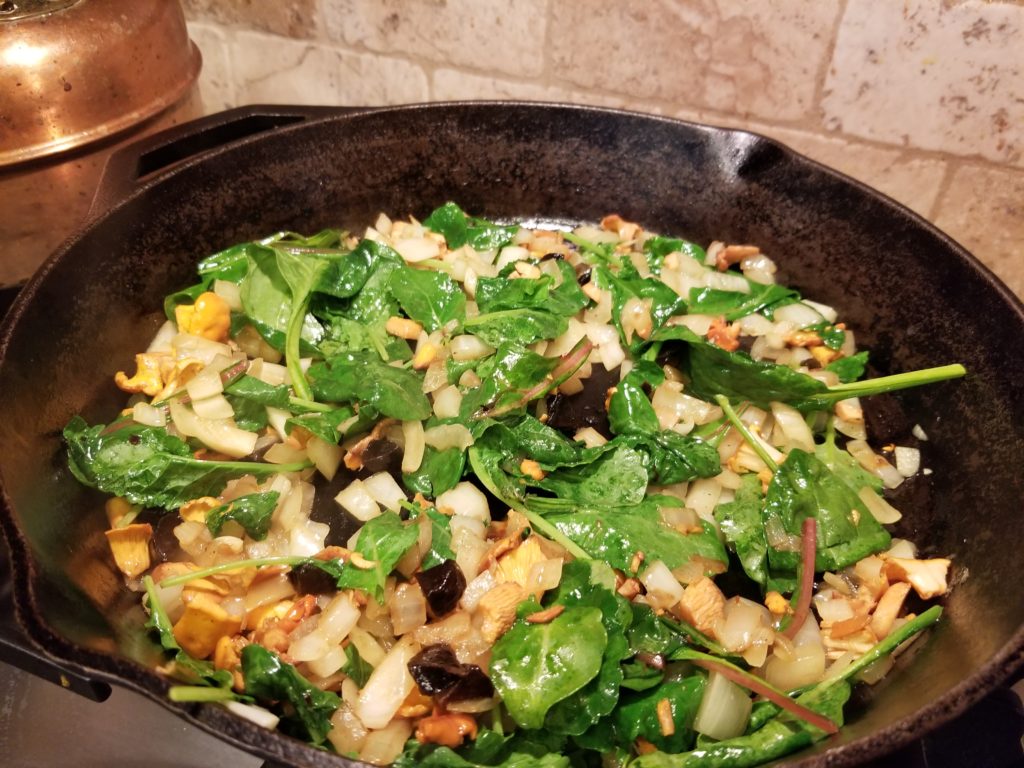
Found some mushrooms and threw them in…


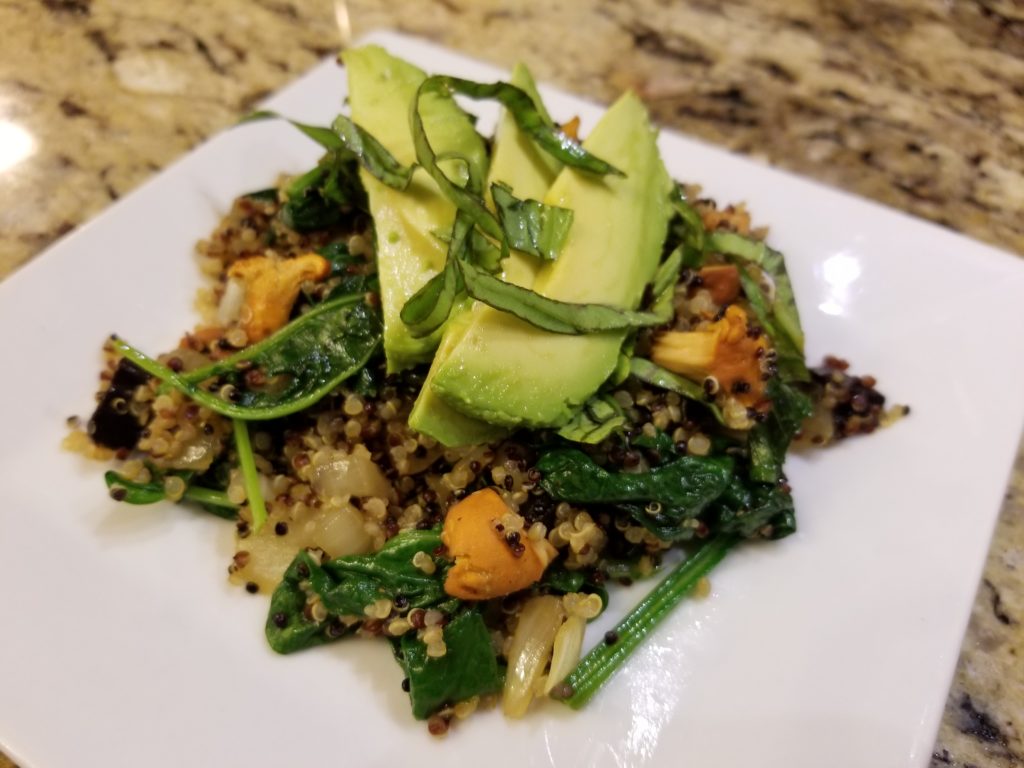
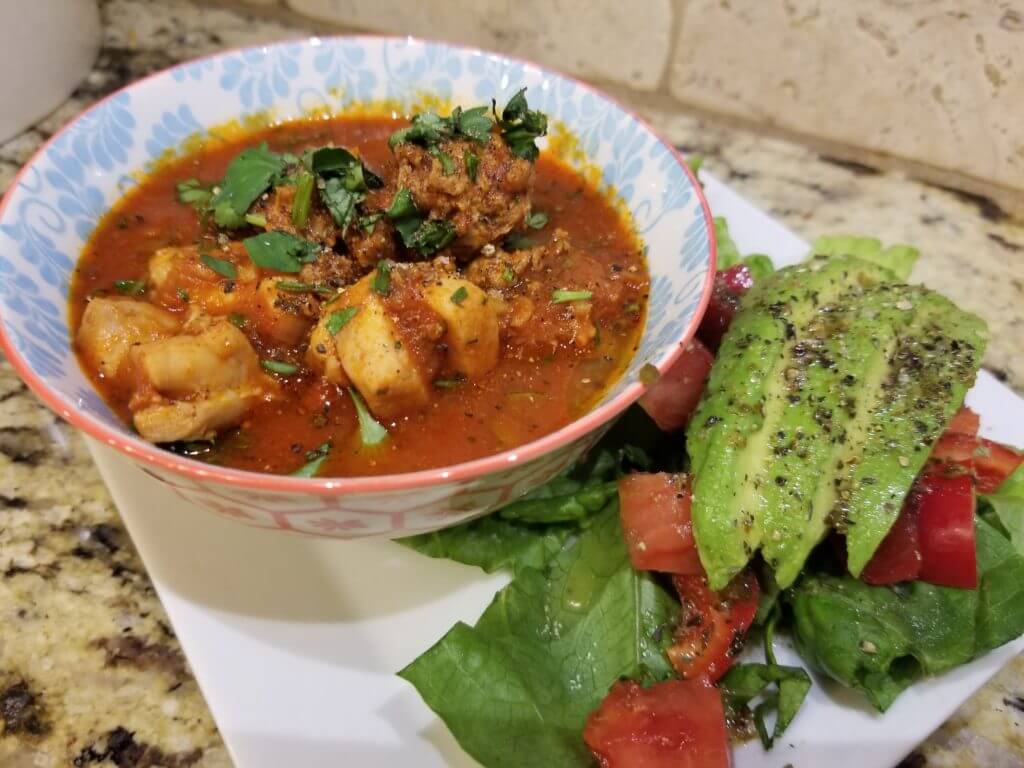
Turn off the heat and add in the peas, kale, and fresh herbs. Salt and pepper to taste and serve each bowl with a squeeze of lemon. Enjoy!


What do you love about fall? Do you have any special fall traditions you do every year? Please share in the comments below!


READ MORE

Zesty Avocado Fries

It’s that time again! The next Tea Talk is coming!


I can’t believe it’s time for Tea Talk: Food As Medicine #4. The last three were so much fun – tea, food, friends and learning. If you haven’t been to one of them, go back in the blog so you can get a little taste of what they were like. But to really experience the Talk, you have to be there. So now’s your chance! The link to get your ticket will be at the bottom of this post.


In honor of the Tea Talks, I usually post recipes in the theme of the talk in the weeks leading up to the event. This one is a little harder though, because the theme isn’t easy to link to a type of recipe. For example, the first talk was general: Intro to Food As Medicine. The second was on Plant Based Living, so the recipes were mostly vegan. The third talk was on Extreme Eating, so I posted keto, paleo, and vegan recipes. But this one…


Can I go off on a tangent? Does anyone else have a food that as hard as you try, you just can’t make fit into a healthy whole food lifestyle? There’s usually one that trips you up. Cotton candy, soda, chips, ice cream, cake. I can think of some healthy substitutes for some of these: kombucha for soda, veggie chips for potato, keto ice cream (maybe). But there’s one I just can’t make work.


French fries.


I know, you can have sweet potato fries. And I like them, but they’re just not the same. When I go out to a restaurant and order a burger (grass fed, bison, all that), I usually get a veggie side. I don’t miss the bun, but I definitely miss the fries. If my husband gets fries, I’m going to “help” him eat them, and I almost always eat more than I planned. They’re my kryptonite!

This recipe isn’t really a french fry substitute. I’m not sure there is one. But I love avocados, and I love fries, so it’s a good idea. They’re also gluten free, ketogenic/paleo, and delicious! They’re just not nut free, so I’m sorry if you’re allergic. This recipe just isn’t for you. The best news is (other than being yummy!), they’re easy to make! So let’s jump in!


Preheat the oven to 450 degrees.

Gather your ingredients – there’s just four! Choose almost ripe avocados so they stay a little firm.


Almond flour, avocados, milk (I used almond), and spice blend (mine had salt, so I didn’t add more. You will have to if your spice is salt free). Add about 1 tsp of spice to 3 tbsp of almond flour. Taste it to see if it’s spicy enough for you!


Half and slice your avocados.


Dip the slices in the milk, then cover them with the flour mixture.


Lay them on parchment paper and roast for 15-18 minutes.


Serve and eat immediately! I ate mine with a sriracha mayo – mmmm good!


Oh, I didn’t tell you what the this Talk is about? On September 30th, we will get together for afternoon tea and talk about Eating For Weight Loss! So while you’re munching on your avocado fries, come on over and get your ticket. Space is limited, so don’t miss out! I can’t wait to see you there!

READ MORE

Summertime Roast Chicken

I usually don’t do recipes that require special equipment or fussy ingredients. Not usually…


But this time, it has to be done. It’s worth it though! It’s hard enough in the summer heat to even think about cooking, much less do it. It’s easier to resort to picking up something on the way home. Besides, who wants to fire up the oven, heat up the house more, and increase the electricity bill? It seems like we spend enough on A/C to fund a small country in the summer months…


That’s one reason why I love my grill. Aside from loving the way grilled foods taste, I like the grease and smoke and mess are outside and when I’m done, the house is still cool and smells like whatever I put in the diffuser. Besides, isn’t all food better with chargrill marks?

I started cooking whole chickens on the grill years ago. I’d cut out the backbone with kitchen shears, cover the whole thing with oil and a spice rub recipe I’d found in a magazine, and lay this butterflied masterpiece on the grates. It was fabulous!

But it takes too long. There’s a lot of prep work in cutting up raw meat, not to mention the very careful clean up that needs to happen before any other food can be prepared. So I started roasting my chickens in the oven in my other favorite piece of cookware…


Enter the cast iron skillet! (Actually, I have three I use regularly.) This workhorse is worth the extra TLC you have to put into it. It can tolerate super high heat, retains the heat well in the iron while cooking, and with correct care will develop a nonstick surface that doesn’t come from chemicals. It will also add a little iron supplement to your food, good news if you’re a little anemic. (Sidebar: I don’t like nonstick pans. Some of the chemicals used to produce these coatings may be liked to cancer and are known to cause flu-like symptoms when used at high heat, due to the fumes produced when the pans are overheated. I’d just as soon avoid them, but if you use them, use only on low to medium heat, don’t overheat or heat a “dry” pan, and consider replacing a scratched pan.)

Cast iron skillets have to be “seasoned” (or you can buy them pre-seasoned). You cook foods in them that contain a lot of oil at high heat and this helps create (or improve) the nonstick coating. Because of the seasoning, cleaning the pans is done with hot water and a scraper. Soap will remove some of the seasoning and add a lovely soapy taste to your next meal. You also need to oil the pan after cleaning to keep that coating up. It’s a little extra work, but I love my skillets! One or two of my kids will probably get one in my will – not sure who it’ll be though…


How to choose…

Anyway, the chicken! This summer, I got tired of heating up the house with the oven, but the kids wanted a whole roast chicken and homemade gravy from the pan juices, so I decided that I could do the chicken on the grill in the cast iron skillet. The grill would get super hot (good for crispy skin), the skillet would roast the bottom of the chicken while the top browned, the drippings would be there for the gravy, and the house would be cool. Win-win!


This is an easy one. Put your whole chicken in a pie plate and make sure the giblets are removed. Oil and season the whole bird (underneath too!). I used palm oil and ghee (because it was on the counter). I’ve also been buying spice blends recently, so I used salt,  berbere and apple pie spice (together they have a Middle East kind of feel). Tie the legs together with some kitchen string if you have it – it’ll help the legs not overcook (I left this out this time as you can see in the pictures). Put your meat thermometer in the breast meat. Then put the skillet in a covered grill on high heat for 20 minutes. When the pan is hot, put the whole chicken in the pan with the thermometer facing you and the breast meat up. Close the lid and walk away.


Check back in about 30 minutes (keep an eye on the grill just in case). It won’t be ready, but you can see the skin browning. You want to cook the bird until the breast meat is 160-165 degrees (around an hour). I used this time to make a broccoli slaw and cut up veggies to grill. I did sweet peppers, onions, and a jalapeno.


Drizzle oil on the cut up veggies and season (I used a grill seasoning and salt).


When the chicken’s getting close to done, you can add the veggies to the grill. Aren’t those grill marks pretty?


Carefully! bring the pan inside and let it rest for at least 10 minutes before carving. You’ll see the temperature come up to about 170. The juices will be clear but the chicken (even the breast meat!) will be juicy and delicious. The best part is the crispy under side. If you carve it up yourself, you get to pick the crunchy parts off the bottom!


Dinner is served!


Roast chicken, sriracha broccoli slaw, grilled peppers and watermelon. Summertime goodness!


What kind of quick, cool, or easy summertime cooking tips do you use? Please share with me in the comments below!

READ MORE

Shortcuts for Healthy Eating

Eating well in the midst of a jam-packed full schedule can seem next to impossible. So often between work and home and activities, there doesn’t seem to be any time for plans for meals, much less cook them. And here we are starting back to school, so the fall busyness is ramping up!


So this week I thought I’d share some of my favorite cooking shortcuts to help you get more homemade whole foods in your life. One of these may save you that run by the grocery store on your way home from work. And if you don’t have to fight for a parking space, stand in line, and drive home in traffic, it may even be faster than picking up dinner!


Make A Salad


I’ve said this one before, but if you prepare a salad and leave it in the refrigerator, half your plate is already done. I mix different types of lettuces and dry veggies (peppers, carrots, celery) and store it in a bowl. You can make it even quicker if you buy pre-washed boxes of greens and mix those together. If I want cucumbers or tomatoes, I’ll add those when I’m ready to eat so the salad doesn’t get soggy. The avocado always gets added at the last minute so it doesn’t brown.


Make Your Own Dressing


Sriracha mayo – quick and easy!


It’s not as hard as you might think. Because I’m trying to eat more healthy fats and fewer sugars, I’m eating creamy dressings. But many of them from the store have added sugars, especially the ones on the shelf. And I don’t have time to pull out the food processor or blender every time I want some dressing. My favorite (and quickest) option is mayo mixed with sriracha sauce. I love spicy food, so this one doubles as a dip too. I just put them both in a little bowl and stir. You can make any compound mayonnaise this way (except maybe roasted garlic or other chunky additions – you need the processor for that). If you buy the basil paste in a tube from the produce section, you can have basil mayo dressing. Like mustard? How about a dijionnaise that you whipped up with dijon and mayo? Any sauce you like can be added to mayo to flavor it. Just be careful not to choose a sauce with lots of sugar (like ketchup or BBQ). Those work against your efforts to burn fat!


Garlic green beans


This is a regular favorite with the whole family. You can do this with frozen green beans, but it’s better with fresh. Also, the thin young green beans (sometimes labeled haricot verts) work best. Luckily for us, they have these organic in bags at Costco. I chop up a few cloves of garlic, heat some ghee or olive oil in my cast iron skillet and toss the garlic for a couple of minutes.  Then I add the green beans and toss. Add a couple of tablespoons of water and 1-2 teaspoons of Better Than Bouillion (our favorite is the mushroom flavor, but you use what you like) to the pan and cover for 3-5 minutes.  Take the lid off, toss and let some of the water cook off. The beans should be tender but still crisp. Side dish done!


Whole Roasted Cauliflower


I picked up this recipe from Real Simple magazine, though they served it with a harissa yogurt sauce I never got around to making. Cut the base and leaves off of the cauliflower, drizzle olive or avocado oil (my new favorite) over the whole thing, then season with salt and pepper. Roast at 400 degrees for 1 hour and cut in wedges to serve. It takes 2-3 minutes to prepare and when you take it out it’s ready to go. Save the crunchy pieces at the bottom for the chef!

If you’re heating the oven this long anyway, you might as well oil and salt a few potatoes (sweet or regular) and wrap them in foil to go along with the cauliflower. If you’re eating plants only or not avoiding carbs, these will be done with the cauliflower. Add some grass fed butter to the spuds and the salad and you’re eating a beautiful vegetarian feast!


Spice Wings


You can do this with any piece of chicken, but I’ve been doing more wings lately because they cook up quickly. Drizzle your oil over the chicken, season with salt and pepper, and then sprinkle with your seasoning of choice. You could do garlic and onion powder if you want something simple, but I’ve been getting Frontier Organic spice blends from Amazon recently. Our current favorite is the berebere spice blend with a little apple pie spice blend. Sound sweet, but it isn’t because there’s no sugar. It’s kind of a moroccan flavor! I’ve also tried the five spice blend with success. Want some heat? Add chipotle or cayenne too. Roast at 375 for about 25 minutes. Make extra for lunch tomorrow!


Use The Grill


I have never understood why grilled foods seem to be reserved for summertime. Yes, cooking outside and leaving the kitchen cooler seems best for the summer months, but why deprive yourself of the joy of the grill just because it’s not summer? Full disclosure though, I have been known to be outside grilling when it’s 40 degrees or it’s raining (usually not in a full-on downpour though!). The grill gets so hot that cooking quickly is even easier than on the stove. Strip your corn and soak it in a big bowl of water while you’re preparing, then throw it on with whatever else you have planned. If you flip it a few times, it’ll be done in a few minutes. Fish fillets are another grill favorite. Again, generous use of oil, spice blends, some salt and pepper, and throw them on. You’ll have fish on your plate in no time! I have a grill mat that helps the fish not stick to the grill, but that’s not required (don’t skimp on the oil). But if you have one, you can do asparagus or green beans without them falling through the grates. Oil them up, grill, and then toss with a little balsamic vinegar, salt and fresh ground pepper. Slice a few tomatoes to go on the side and dinner is served!


These are some of my favorite quick meal tricks. What fast meal tricks do you use to get healthy food on the table? Please share with us in the comments below – we can all use more tools in our kit!

READ MORE

Chanterelle Quinoa (One Skillet Meal)

This week has been nuts!


I worked all last weekend at the hospital and this is now my last week to get the oldest three kids ready for a week away at camp. The five year old is staying with a friend next week while the other kids are at camp so I will be child-free for the week. With all the allergies the youngest has, I am packing both clothes AND food for her while she’s away. I hurt my back and have been working on my yoga and stretching to feel better.  Plus, I’m trying to wrap up loose ends at the office, Father’s Day is Sunday, and my mom and brother have birthdays next week and everyone’s cards need to get in the mail. Like, right now.


But there is a method to the madness. My birthday is next week! So, I’m planning a restful week and in order to get that rest, I have to double time it to get everyone else set up to function without me. So this week even more than usual, I need some quick food options that don’t require a take-out menu.


Enter the Instant Pot again! Have I said I love this machine? I pulled it out yesterday when I flew in the door at 6 pm, threw two cups of quinoa and two cups of water in it, hit the “rice” button, and ran off to take a shower. The quinoa was perfectly done when I came back and I ate it with some sauteed veggies and grilled fish I made the night before.


One of my favorite timesaving kitchen toys…


Today I spent a wonderful morning with one of my best friends to celebrate by birthday in advance. We went into the forest park near her house and foraged chanterelle mushrooms. I love all kinds of mushrooms, but chanterelles are incredible and very, very expensive. We went back to her house with our bounty and she made me a birthday frittata with the chanterelles. She also made me some vegan, gluten free chocolate truffles, because she knows how much I love chocolate and she loves me.


Fresh from the woods…


Mushrooms are one of my favorite foods. Ok, that sounds strange, but they go so well with everything! I love them in salads, on pizza, and in scrambled eggs with onions, spinach and tomatoes. I’m getting hungry…

Mushrooms are also incredibly good for you. You’ve probably seen something in the media about medicinal mushrooms like chaga, reishi and cordyceps being good for all kinds of good things like memory, immunity and regeneration, but even the ones you see in the grocery store all the time like portabello and white button have some wonderful health benefits. Mushrooms are low in calories and carbohydrates, but high in B vitamins, antioxidants and antiviral and sometimes tumor-fighting compounds. Mushrooms can help boost your natural immunity by protecting from DNA damage, increasing your disease fighting cells, and helping your natural detoxification process.  Did you know that some antibiotics are derived from mushroom fungal compounds? Now to be accurate, mushrooms are neither fruit nor vegetable. They are a fungus, which sounds bad, but it’s really not. I like to think of them as delicious medicine!


So, I brought some chanterelles home and made a quick veggie dinner. You can use any mushrooms you have, but if you can get chanterelles, they’re delicious! You also could substitute rice for the quinoa, but the quinoa has more protein and it’s really pretty too.


My chanterelle harvest!


Chanterelle Quinoa (One Skillet Meal)

One onion, chopped

One tbsp garlic minced (I used black garlic because it’s sweet and mild – regular fresh garlic works great too, and you can use the kind in a jar too if you want!)

Two handfuls greens (spinach, kale, chard – whatever you have. Make sure they’re baby leaves or cut them into smaller bite sized pieces)

1/2-1 cup sliced mushrooms

1-2 cups cooked quinoa

1-2 tbsp of your favorite fresh herb (cilantro, basil, etc) to top off your plate


(I didn’t use the sun dried tomatoes, but they would have been good!)


Cut all your veggies up and have them ready to go in the pan. This is gonna be quick!


Saute your onions first, approximately three minutes in some olive oil or ghee. Add the garlic for one minute, then add your mushrooms and stir until they are slightly cooked through. They’re gonna keep cooking with the other veggies, so don’t cook them completely.  Last, add the greens and cook until slightly wilted. Season your veggies with salt and any other spices you like.


Add the quinoa and stir until warmed through. Sprinkle your shredded herb of choice over top. Add fresh ground black pepper on top and serve!


I topped mine with avocado and basil. It was delicious!

See you in a couple of weeks!


READ MORE

Keto Snickerdoodles

This one is for my non chocolate people! (I don’t understand you, but I love you anyway!)


I’ve been trying to stay on the no sugar track, but I still really like my cookies. If you want to read more about why I’m avoiding sugar, go to my post A Week Without Sugar.  And as much as I am a chocolate purist, I want some variety too! My low carb double chocolate almond butter brownie-cookies are ridiculously good, but occasionally I want something without chocolate. Just occasionally. I made low carb no-sugar cheesecake cups (and they were good), but they’re kind of like pie. I’d rather have a cookie. Here comes my dessert philosophy…


There are two kinds of people in this world: cake people and pie people. I think that cake people prefer things like cake, cookies, brownies. Pie people prefer pie, cheesecake, fudge, and cobblers. I am cake people. I think it’s a texture thing – I don’t like cheesecake or fudge, and the only pie I’d make (maybe) is pecan. I know, I may get my woman card revoked for the cheesecake/fudge comment, but it is what it is. Also, I personally don’t categorize fruit as a dessert. It’s fruit. I’d rather eat it for breakfast. And, don’t EVER mix fruit with my chocolate. It’s sacrilegious. Except for dried cherries, but even then only in small doses. Nuts are ok and actually welcome in chocolate, especially almonds.

Can you tell I’ve given this a lot of thought?


So in come snickerdoodles. A soft, cinnamon, pillow-like sugar cookie. I love cinnamon and often mix it with my chocolate too! But if you take away the chocolate, I love cinnamon desserts. So how do you get a sugar cookie without sugar?

You make it keto style. Now, I actually reworked this recipe because it didn’t come out well the first time. I got the original recipe from I Breathe I’m Hungry. She makes the cookies with erythritol, a sugar alcohol that has no effect on blood sugar, but it can leave a funny cold sensation in your mouth and I don’t like it. So I changed some things up, but you can get the original recipe from her link. I also couldn’t get my cookies to stay puffy like hers, but they taste good anyway!


Keto Snickerdoodles


Ingredients

Cookies:

2 cups super fine blanched almond flour

3/4 cup xylitol

1 tsp vanilla

1 egg

1/2 tsp baking soda

1/8 tsp sea salt

1/2 cup softened butter


Coating:

1 tsp cinnamon

4 tbsp xylitol (I ground mine to make it finer and cover the cookies better, but this is optional)


First, preheat your oven to 350 degrees. Then line a cookie sheet with parchment paper.


Gather your ingredients.


Put your cookie ingredients in one bowl and the coating ingredients in another small bowl.


Mix with a large fork to form a stiff batter.


Scoop the dough and shape into balls. Don’t handle too much or your butter will melt in your hands. Roll in cinnamon sugar and place on a baking sheet on parchment paper.


Bake at 350 degrees for 15 minutes and allow to cool. Enjoy!

READ MORE

Chocolate Brownie Cookies (no sugar, no flour)

I love chocolate. I’m sure I’ve said this before, but I think chocolate should be its own food group. The thought of giving up chocolate was the one thing that kept stopping me from eliminating sugar from my diet for more than a year. Eliminating flour is hard, alcohol not so fun (I like a glass of red wine here and there), sugar seemed tough, but chocolate was a no-go. I had to find a way to get my chocolate minus sugar or it wasn’t happening.


Enter sugar substitutes (and there are many!). But they’re not all so good for you, and I didn’t want to replace the sugar with a chemical that was just as bad or worse for my health. That eliminated sucralose (Splenda), aspartame (Nutrasweet), and saccharin. That left stevia, xylitol, and erythritol. I’ll write a more detailed post on sugar substitutes sometime, but these three are safer than the others. Organic stevia is my favorite since it is an herb, but it’s hard to substitute equivalents for sugar in recipes because you use such small amounts (it’s SUPER sweet). The sugar alcohols (erythritol and xylitol) are low on the glycemic index, they are derived from natural substances (xylose or corn), and and very low calorie. However, it’s best to get organic erythritol to avoid GMO corn, and consumption of large amounts of sugar alcohols can cause bloating, gas and other GI upset. But for a small cookie (or two!) sometimes – this was a good option for me if I wanted to avoid sugar.


So when I found this almond butter based cookie recipe using coconut sugar, I thought I’d substitute xylitol and see what happened. Sometimes baking with the sugar alcohols (particularly erythritol) can give a funny cold sensation in the mouth when you eat the pastry, but I find that with chocolate, that’s not there at all. I shared this cookie with Auntie A (who’s not a chocolate lover or a sugar freak) and she loved it! She is a chewy-brownie fan (as opposed to a cake-brownie fan), and that’s what this cookie will remind you of if you don’t over bake them.


So in celebration of the upcoming Tea Talk on Extreme Eating, here’s a sugar free Paleo and Keto cookie recipe that you can try out for yourself! If you want to try a sample, come to the Tea Talk  – I’ll have some there! See the link below to grab your spot before they’re all gone…


Chocolate Brownie Cookies (no flour, no sugar)

Based on the recipe for flourless paleo chocolate almond butter cookies at ambitiouskitchen.com

Yield: approximately 30 cookies using a small cookie scoop


Ingredients

1 cup plain almond butter (runny and smooth)

1/2 cup xylitol

two eggs, lightly beated

1/3 cup cocoa powder (I used Hershey’s Special Dark for extremely dark chocolate cookies, but you can use what you like)

1 tsp vanilla extract

1 tsp baking soda

1 tsp melted coconut oil

1/4 tsp sea salt

1/3 cup stevia sweetened chocolate chips (or use dark chocolate chips if you can’t find them)

Fancy flake sea salt for sprinkling on top


Preheat oven to 350 F. Line a baking sheet with parchment paper.


Put all ingredients in a bowl except the chocolate chips.


Mix well. Fold in the chips.


Scoop (or mold with your hands) dough into balls and place on cookie sheet. I used a small cookie scoop for this size cookie.


Slightly flatten each ball with your fingers and sprinkle with a little fancy salt. Not too much or it’ll be overwhelming!


Bake 7-8 minutes – don’t over bake!

Let cookies set on the sheet for 5 minutes and then allow to finish cooling on a rack. Enjoy!


If you want to get your spot to the Tea Talk, go to this link to hold your space!

READ MORE

Tom Kha Gai (Chicken Coconut Soup)

I miss rice.


When I was little, my mom told me that maybe I should have been Asian, because I loved rice so much. Didn’t matter what kind – white, brown, sticky, I ate them all. A little sauce and a big pile of rice – yum! Or maybe a piece of warm bread. Yeah, I love bread. The best smell in the world is baking bread, right? Second only to the smell of fresh out-of-the-oven warm melty chocolate chip cookies.  Or brownies. Or cake!


Ok, maybe this keto thing is getting to me.


Just kidding! I’m actually not doing too bad. I’m still not sure that this is a lifestyle change for me, but I’m not feeling much in the way of cravings. With the exception of that one heinous day in the office when I came home and wanted to face-plant into the twin’s birthday cake, I’ve been pretty good. But I do miss the rice-and-sauce combo so commonly found in Asian cooking. I love all those dishes with ginger and soy and lemongrass and the curries. Without a pile of rice or bread, what do you do with the sauce?


You make it into a soup.


One of my favorite Thai soups is the perfect example of all the deliciousness of a sauce that doesn’t require any additions to make it work. Actually, I could (and have) leave out the chicken when I order it at a restaurant. And I haven’t made it myself – until now! The new recipe book I bought (The 30 Day Ketogenic Cleanse by Maria Emmerich) had a recipe for this soup and it is incredible. The only specialty item you need is the red curry paste, but you can often find this in the Asian foods section of the grocery store. So many of my favorite flavors in one pot – curry and lime and cilantro in a creamy coconut milk base. It’s amazing! This is one of the few recipes that I haven’t made any tweaks of my own – it’s that good!


Tom Kha Gai (Chicken Coconut Soup)

Ingredients


2 tablespoons MCT oil or EVOO

1 cup thin sliced napa cabbage (you can use other kinds, but the napa is very soft and becomes noodle-like in the soup if you slice it very thin)

1/4 tsp fine sea salt

1 lb boneless skinless chicken breast, sliced into strips against the grain (the original recipe calls for 2 inch pieces, but I like strips)

3 shallots, diced

1 1/2 cups chicken bone broth (I made my own from her recipe in this same cookbook and whoa!  It was even more rich! Also easy – just put the ingredients in the slow cooker and let it simmer away for a couple of days. Yes, I said days. That’s how you get the goodness out of the bones!)

1 can of full fat coconut milk

1/4 cup chopped cilantro

2 scallions chopped (chop extra cilantro and scallions for garnish)

Juice of one lime


Saute your cabbage in one tablespoon of the oil in a large heavy bottomed pot over medium heat until wilted. Then remove it and set it aside.


Add the 2nd tablespoon of oil and sear the chicken in the pot. Sprinkle the salt over the chicken while it’s cooking and don’t worry about cooking it all the way through. It will cook through in the soup.


Add the shallots to the pot and cook for 2 minutes or until tender. Turn your heat to low and whisk in the curry paste, coconut milk and broth.  Simmer uncovered for 20 minutes, up to 40 minutes if you want a thicker sauce. I simmered mine almost completely covered, and only for 20 minutes because I wanted more soup than sauce!


Add back the cabbage, scallions, cilantro and lime juice. Stir and remove from the heat immediately.


Serve with more scallions and cilantro and enjoy!

READ MORE

My Yummy Science Experiment

I’ve been conducting a science experiment. On myself.


Before anyone gets alarmed, let me say this is a nutrition experiment. I’m not taking any medications or new supplements. But I’ve radically changed my current diet recently to see how my body would respond to something different. It all started with the quitting sugar experience. Did you see that post? I expected to have these horrible cravings and awful mood swings and crankiness, but it didn’t happen. Well, I didn’t feel any more cranky than usual (you’d have to ask my husband for an objective opinion!).  That was just around Thanksgiving, and I haven’t had any sugar since then. When I gave up the sugar, I also gave up foods that went with the sugar, which means I gave up processed flour. Essentially, I started a low carb diet.

But in the interest of not completely losing my mind to find something to eat, I started eating more eggs and meats. While I had been eating more heavily plant based, I was flexible. I buy our eggs from a farmer and shop for the cleanest meats I can find, mainly because my husband and kids are not vegetarian and I want us to be eating safe and delicious. I also have huge issues with the way most of the meat is produced in this country, but that’s another topic for another day. Suffice it to say, I’m particular about my animal proteins! Anyway, when I started trying out new recipes for this low carb diet, I found lots on the web about the Paleo and Ketogenic diets. Now, when I was in school for holistic nutrition, each week we’d study different food theory. It was recommended that no matter what our personal philosophy on food, that we remain open to the new information, and if possible, try the food style on ourselves.  So having not tried the ketogenic style of eating myself before, I thought I might give it a whirl…


Disclaimer time: I am NOT recommending that you try this eating style. This is something I decided to try on myself to see how I’d feel. The health claims surrounding this diet are compelling, and I’ve seen the dramatic weight loss in a couple of physicians I work with who have adopted this way of eating. That doesn’t mean you should do it. But, as a physician and holistic healer, I can’t very well recommend something I don’t know anything about. And the fullest way for me to learn about this style of eating was to experience it. I have lots of patients and friends who are struggling with weight and major medical problems. If this is a tool that might help someone, I wanted to have tried it so I could offer it as an option for those who need it.

In general, I think that the healthiest diets are probably not the ones that exclude entire food groups. Balance is key. BUT… I’ve also said that the more significant the medical dysfunction, the more radical the diet will need to be to reverse the dysfunction and promote healing. And, people are different. Everything will not work for everybody. Let me tell you what I’ve experienced, and you can decide for yourself.


When I quit sugar, I lost four pounds that first week. That’s not fat folks, that’s inflammation. I was retaining fluid as a side effect of the sugar I was eating (and it wasn’t much – some mini dark chocolates, and a half cookie sometimes).  Sugar promotes inflammation in the body, no matter what kind or how much. We eat way too much sugar and starch in this country, especially in the form of processed foods. When I started eating low carb, I dropped one to two more pounds. Then a colleague who has lost almost 100 pounds told me she used the ketogenic diet to lose her weight. Many have reversed their diabetes, insulin resistance, PCOS (polycystic ovaries) and infertility using this diet. So I started investigating.

The ketogenic diet is a high fat, moderate protein, very low carbohydrate diet. That’s right, high fat. The concept is, that your body tends to burn carbohydrates first if given that chance. But if no carbohydrates are available, the body can burn fat as its primary fuel, and will pull from your fat stores for energy if you don’t overfeed yourself. The recipes on the web are full of MCT coconut oil, cheeses, fatty meats, avocados and nonstarchy veggies. No fruit. No bread. No root veggies (potatoes, beets, carrots). No rice or pasta. There are bread substitute recipes based on cheese and almond or coconut flours if you want to have something bread-like, but you’ll have to make it yourself.


Let me show you what I’ve been eating (in addition to the obvious eggs and meats and tuna and salads and veggies).


Cinnamon rolls…


Tom Kha Gai (chicken coconut soup) and a half keto bagel


Spicy chipotle chicken chorizo stew and a salad


Death By Chocolate ice cream. No sugar!


What’s the results of all this high-fat eating? Did I gain a ton of weight? Actually, no. I’ve lost a couple more pounds. I will say this though – if you’ve been overweight as I was, the closer you get to a normal body-mass index (Google: BMI calculator and see where you are), the harder it is to drop weight, no matter what eating style you adopt. The first week I was tired. That’s what you’re told you’ll experience as your body changes from burning carbs to burning fat (called ketosis). Some people have headaches and muscle cramps, keto breath and more. But I had all the birthdays for the kids, and I was on call and I’m generally wiped at this time of year anyway, so I’m not sure how much was the diet and how much was life. Also, all that dairy definitely slowed down the ol’ digestive tract. More gas too. TMI? Maybe, but I thought you should know.  You can do the ketogenic diet without dairy – I just didn’t. A great book is The 30 Day Ketogenic Cleanse by Maria Emmerich, and she does mostly dairy free recipes. She lays out the theory and pitfalls, and it’s also a great cookbook.


Will I continue? I don’t know. In the long run, I probably will return to a more balanced flexitarian diet with some whole grains and less animal proteins. I love my veggies! Maybe I haven’t done this keto thing long enough. If I experience a huge jump in my energy in the next few weeks, maybe I’ll stick with it.  One thing I’m convinced of is this: I was eating too much sugar. Even as I ate only dark chocolate, used stevia in my drinks, and ate only whole grains. Now that I’ve found some good substitutes for the sugar, I’ll fiddle with the rest to see what works for me in the long run. Everyone is different. Only you can find what works for you!


What do you think about the extreme eating styles (veganism, keto/paleo, no carb, plant based)? What have you done that works for you? Please share in the comments below!

READ MORE

Brussels and Kale Caesar Salad

I love brussels sprouts.


Guess I’m strange that way. I was the kind of kid who liked eating my vegetables (my mom was lucky!). But I didn’t learn to like brussels sprouts until I was an adult. The first dish I can remember was boiled brussels sprouts, steaming away in a cafeteria chafing dish. Cooked like that, I know why they have such a bad reputation. They smell funky and they taste watery and bland. But it doesn’t have to be that way! Brussels sprouts have become very popular in restaurants these days. Deep fried, sauteed with bacon, glazed with balsamic vinegar and made into a slaw. There are so many good ways to eat them! But my newest favorite is in a salad.


Brussels sprouts are part of the brassicaceae family, which include cabbage, collard greens, broccoli, cauliflower, arugula, and bok choy. Yum! I love all those. This recipe takes this tiny version of a cabbage, pairs it with kale and a zippy dressing, and tops it off with crushed almonds. It’s fresh, tangy and delicious. So let’s get to it!


This recipe is based on a kale and sprouts salad from pinchandswirl.com.


Ingredients

Dressing

3 tbsp mayonnaise or vegan mayo if you prefer

1/2 minced shallot

2 teaspoons smooth dijon mustard

Juice of one lemon

3 tbsp extra virgin olive oil


Salad

8 ounces of brussels sprouts

Lacinto (dinosaur) kale

2 ounces shredded parmaggiano-reggiano cheese

1 ounce toasted salted almonds, coarsely chopped


Instructions

Cut the tough ends off the brussels sprouts and strip the kale leaves off the stems.


Shred the kale and sprouts with a food processor with the slicing blade. You also can do it with a sharp knife if you don’t have a food processor.


Prepare the dressing in the bottom of a large bowl.


Whisk together the mayo, shallots, mustard, olive oil, lemon juice and add salt and pepper to taste.


Toss the vegetables and half the cheese in the dressing and top with the rest of the cheese and the almonds.


Enjoy!


What vegetables do you love? What’s your favorite way to prepare them? Please share in the comments below!


READ MORE